
The last item in my “phase 2” of my Dropzone Commander board was something I originally dismissed: a highway overpass. Colton has a small bridge overpass that we’ve used in games and it does well but I figured I already had the vertical options of my board solved with my differing board heights and canal run.
One of the first custom terrain pieces I ever made was actually a paper craft overpass that we used in several games until Colton bought a sturdier and seeing my old design inspired be to create an option for this latest board as well.

I went into Fusion 360 and decided I wanted more of a skeletal frame for my pieces. This would allow for variety and customization as well as save on material and print time.
Ultimately, I created a straight piece, a “broken” straight, a 45 degree curve, and some broken “end” pieces. Raised highways usually use on ramps which would be long and take up a lot of space and I’m not a fan of just straight ramp ups to a highway that usually doesn’t follow the normal orthogonal street layout so the broken end pieces of a large freeway running through the city was the first option.
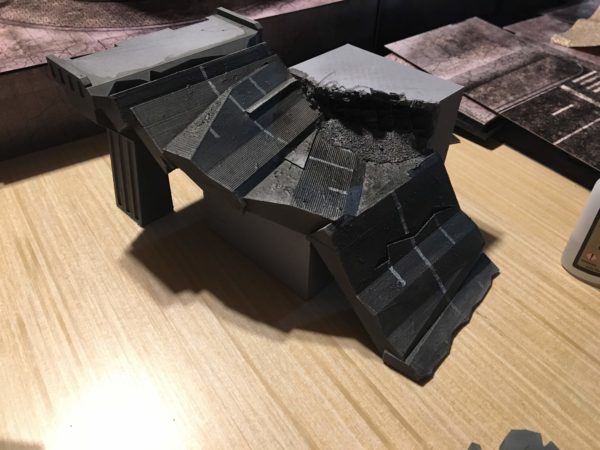
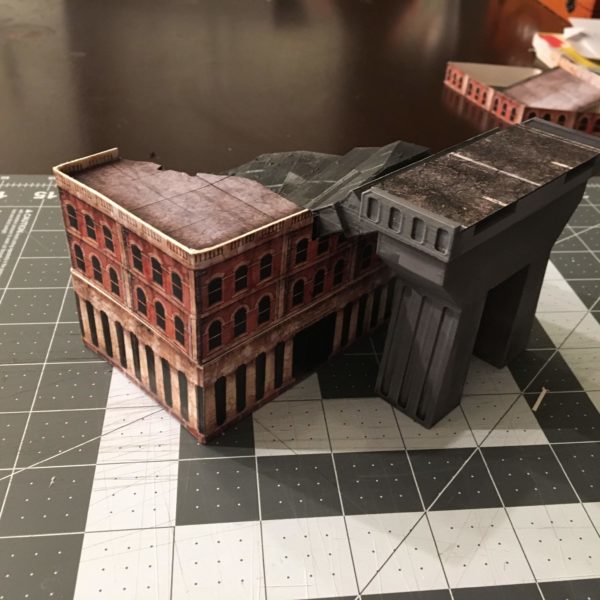
Colton then kept on me about some sort of non-standard ramp and we discussed broken or damaged highway that would form a natural ramp up. Eventually, the above piece was born. It is more of a set piece in that it isn’t as portable as the rest of the pieces but I really liked creating it. This is already primed and painted and just needs the paper terrain to help it match the rest of the board.
The blocky sides are the bones of a building that was partially crushed under the highway collapse. I used a dremel to cut into the finished model and create the open wall effect. I also used some green stuff and sand to create more debris where that inner portion of the building make have continually spilled out.
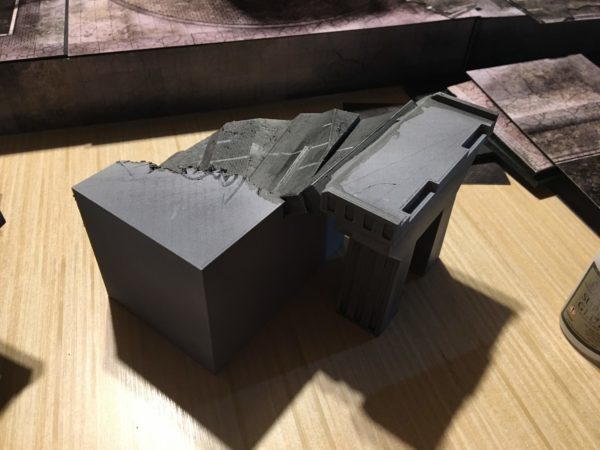
Now with the paper terrain glued on. I’m still cannabalizing my second Ruinscape set to complete all this and have plenty more.
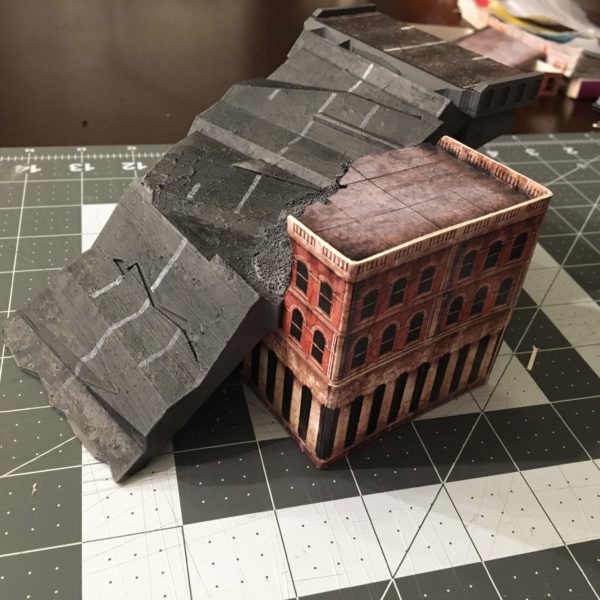
I really like the way the piece turned out and I now have an option for vehicles to get up to the highway top.
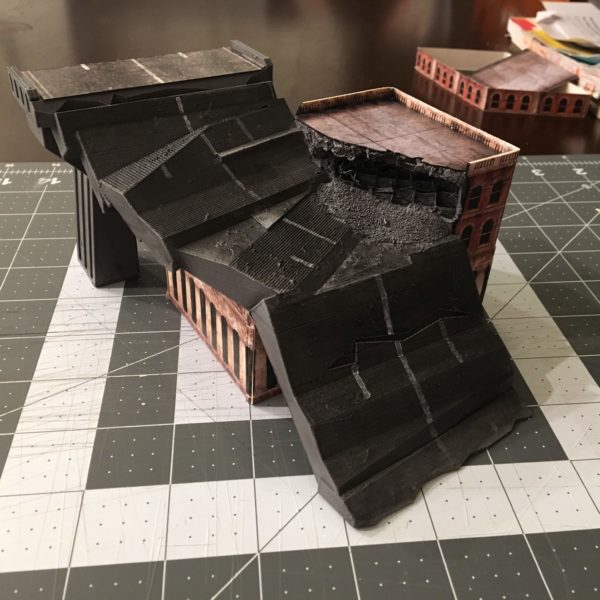
Next, I finished up the main pieces. Primed grey and then a haphazard use of Nuln Oil GW shade and brighter drybrushing completed the painting side. The road work came from cutting up more street tiles from the Ruinscape set and gluing them on.
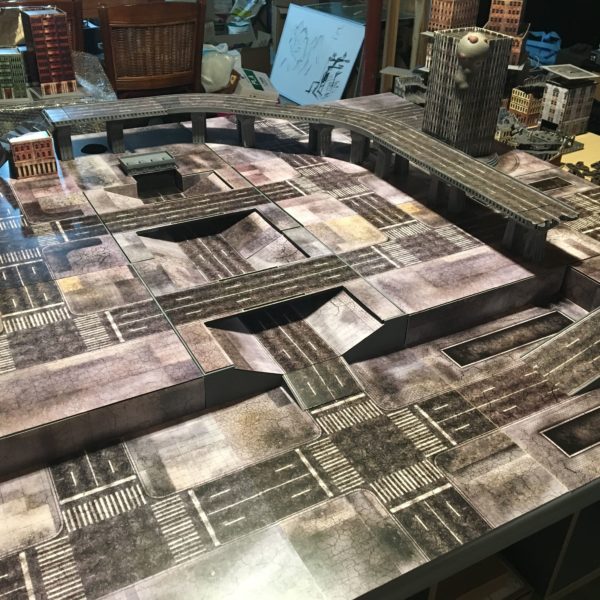
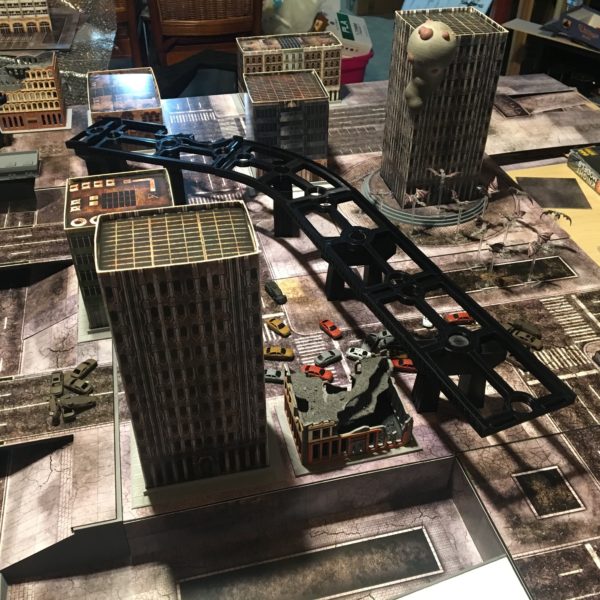
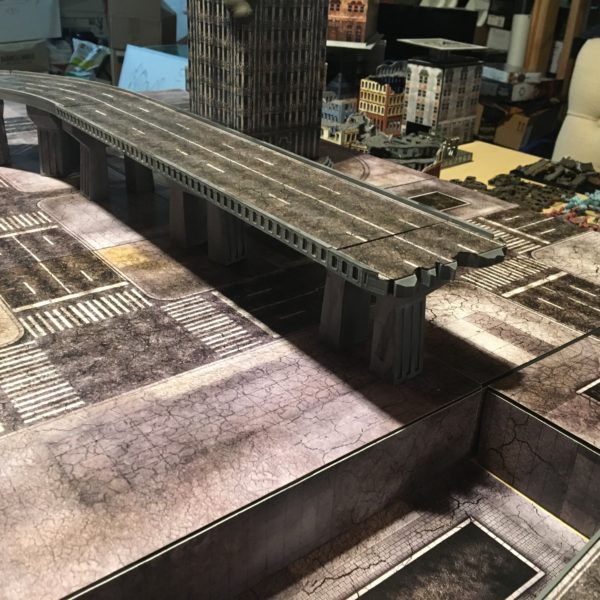
With the map open there are four different height layers to the Ruined City now. Various ramps and tunnels, overpasses and bridges connect the city in different ways and the entire thing is modular for different layouts.

Adding in my earlier work with the buildings and cars help to bring the city together.
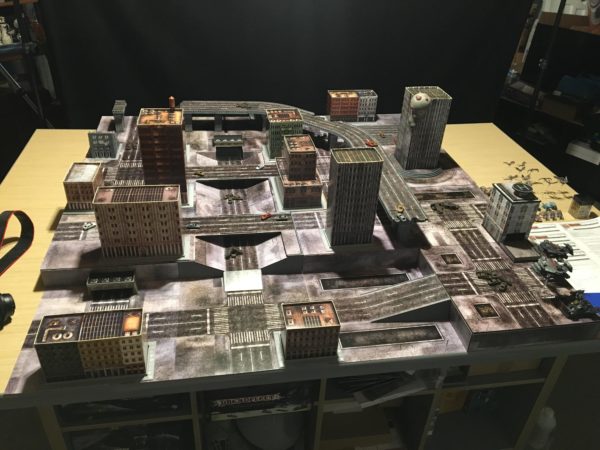
And with that, my final layout of The Ruined City comes to life. I have more options I’m working on but I’m going to step back and see if I can work up my solo plan and get some actual games in on the table first.
In other news, tomorrow starts April and with most of the country/world shut in I saw an interesting post about people running personal challenges. I don’t know if this is a “thing” as I couldn’t find anyone really pushing the idea but a user on Facebook (tragically, I didn’t copy down the name) mentioned that they were doing a “30 for 30” challenge: paint for at least 30 minutes a day for 30 days.
Given the Stay At Home orders going around, I thought this was a good idea and maybe one of the few times I’d actually be able to complete it. I’ll try to post quick snippets of my progress during April on this challenge to see if I can make it the whole time. It will definitely help to clear out my painting backlog.