
We are in block 3 of the escalation league for Infinity and we’ve graduated to the full game. All units are available without restriction. All rules and equipment options are available and all mission rules and objectives are in game. The only difference in games at this point are the points are capped at 250 to help people still build and paint up to this level.
With the new 250 point target and more models painted, I feel like my Dahshat lists are more like the faction intends. Before, my lists seemed like Yu Jing Invincible Army cheating with some special named characters. Now I have Ghulami, Hunzahut, and some remotes to add in to those special characters that Invincible Army couldn’t usually take.
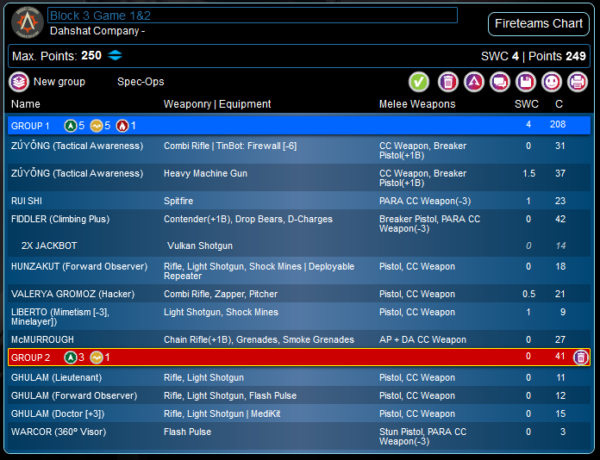
Consider my 250 list for the Supplies mission. Out of the 12 unit roster, only 4 of them can also be found in Invincible Army or even Vanilla Yu Jing for that matter. There are the special characters like Gromoz, Fiddler, and McMurrough are all fun additions that can’t be found in any army I typically run. The Hunzakut and Liberto also feel uniquely different to me and the Ghulam are… well they are basic line infantry but one is a doctor+ so that is new-ish.
Game 1
Doing the Supplies mission for both these games this weekend. For this block, we are doing Supplies or Acquisition and I don’t have a motorized bounty hunter painted up yet for Acquisition so I pushed for Supplies.
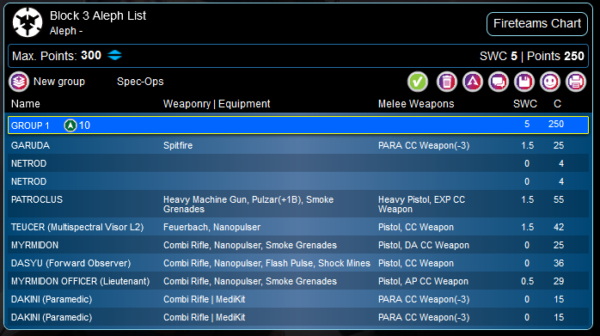
My first opponent was playing ALEPH and I won the roll off and decided to go second. This gave ALEPH the advantage of choosing deployment and making me deploy first. I’m not 100% sure this was his list but it is close enough to not matter as only the main tools in this list came into play.
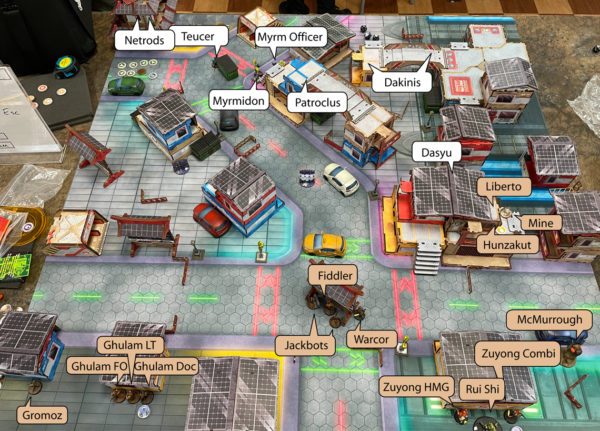
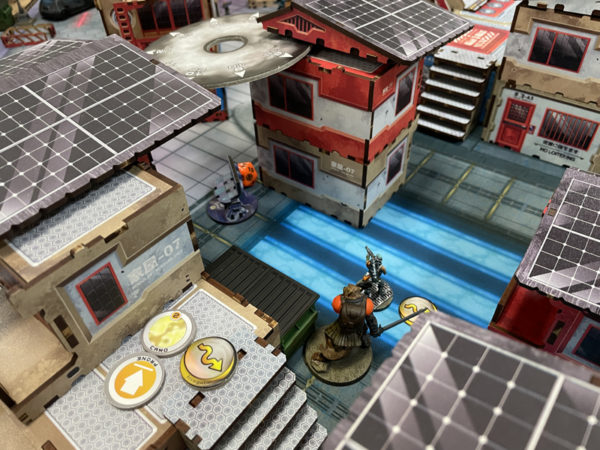
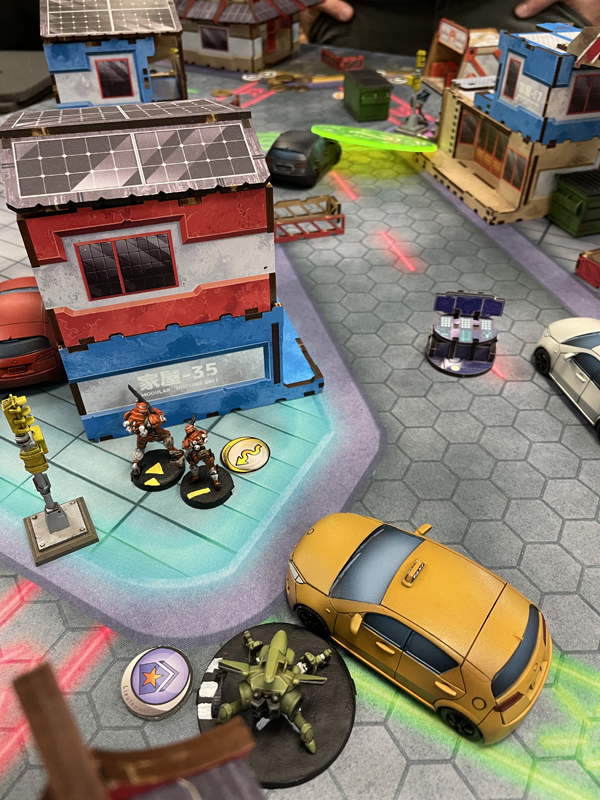
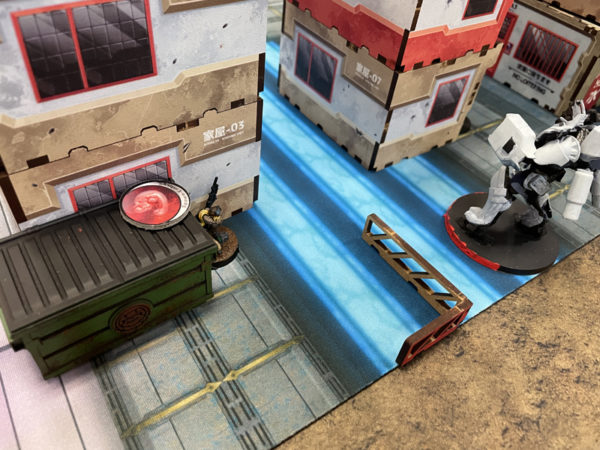
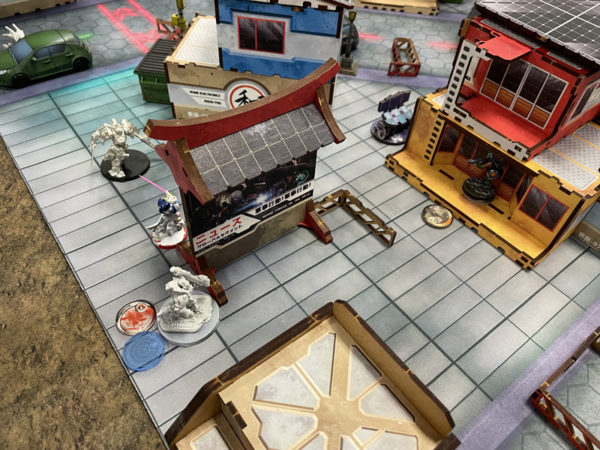
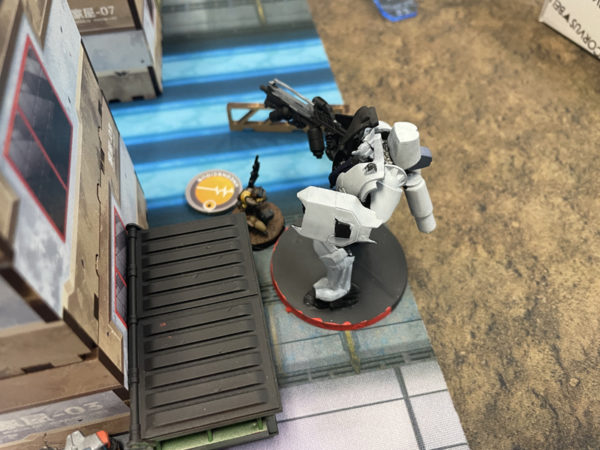
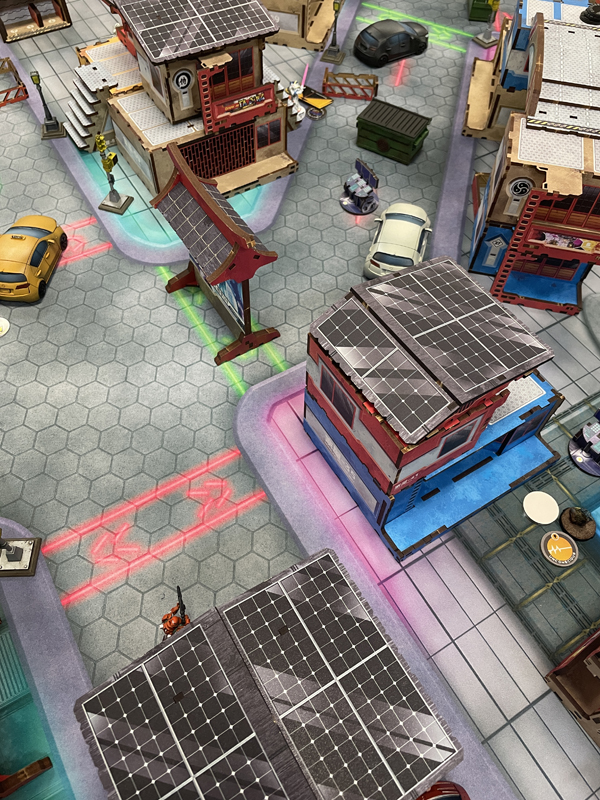
I set up to fully “null deploy” and keep the majority of my units as hidden as I could. The side I was gifted was pretty sparse in deployment zone coverage so most of my teams had to cower together in little clumps. I held the Liberto in reserve but placed the camo Hunzakut out by the right side tech coffin hidden behind a building in the picture (which is used to pull the objective supply box and gain VPs for the mission).
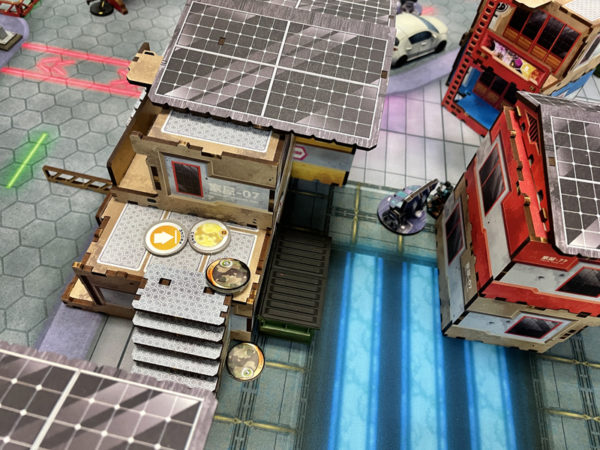
I think ALEPH held back Patroclus to see where he would attack from and placed the Dasyu within millimeters of the right side tech coffin. I placed my Liberto and his mine out to help the Hunzakut and the three camo tokens were enough to really push the Dasyu back a step and reconsider what the first orders would be.
Dasyu decides to go for the tech coffin and tries to move in. I spring the Liberto trap with mine and template shotgun. Dasyu fails his dodge and eats two templates, failing one save and goes down. A sad start for the ALEPH team.
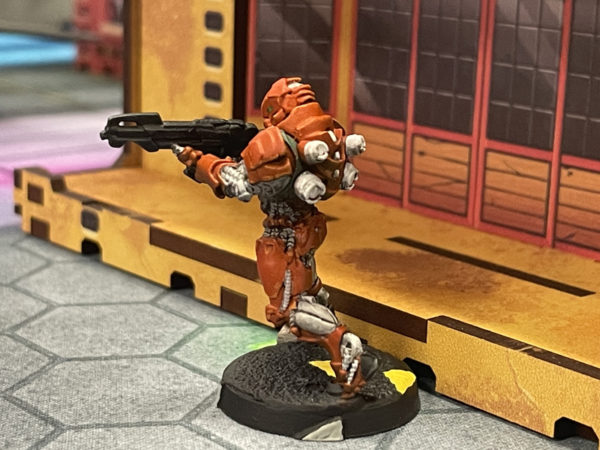
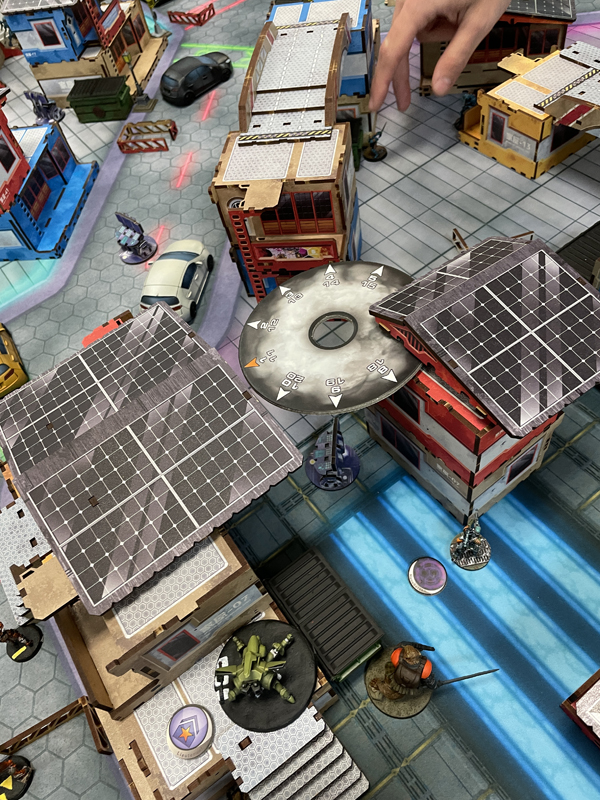
The Teucer has a shot on the Warcor and takes it. Warcor tries but against a real weapon, he fails. He is still alive though so goes unconscious from the force of the blow. Next a Garuda parachutes in on the board edge and decides to get an angle on one of Fiddler’s Jackbots (newly painted with post forth-coming). The Jackbot dodges but fails and the long shot from the spitfire gets a hit in. The Jackbot fails to save and goes down.
A funny thing about these cool little jackbots Fiddler built… they are pretty finicky and tend to explode when they go down. Now this wasn’t what I really thought about during deployment. I just thought they needed to be close (actually just coherency so 8″ away) and that was why I tucked them close to mama. Mama is learning from her mistake as that jackbot full-on ruined her day. It exploded (Fiddler failed to save), it hit the other jackbot (it failed to save), which then exploded, which hit Fiddler again (who failed to save) and the unconscious warcor (who also failed to save).
Well, that was fun.
The Garuda decided to start strutting its stuff and taking more long range shots but nothing else fell to it. Running low on orders, ALEPH repositioned for my counter-attack and put Garuda into suppressive fire.
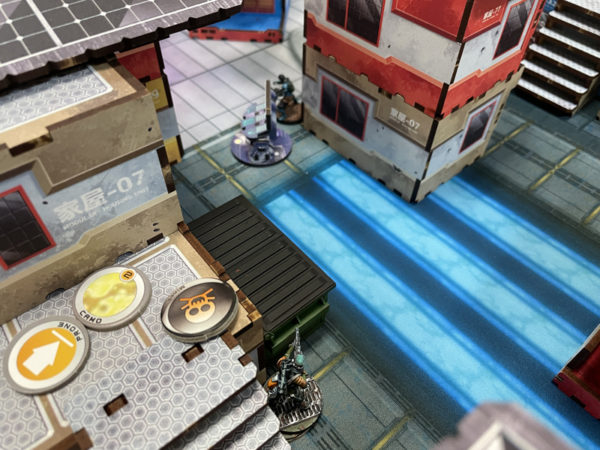
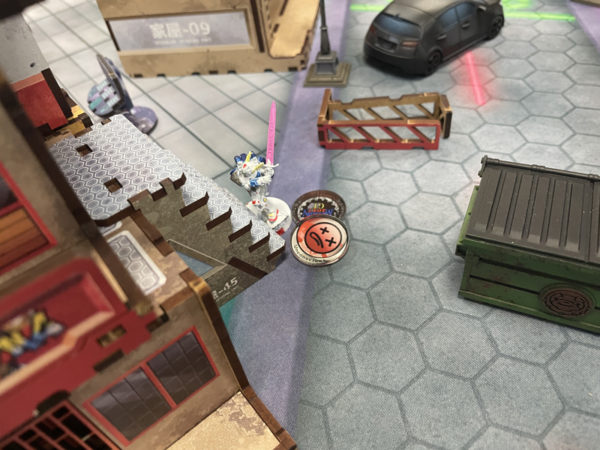
I start off by spending my remaining command tokens to move the three Ghulam infantry into one big order group (I used one to strip out 2 orders from ALEPH on his turn). Impetuous McMurrough runs forward into the fray and I use another order to have him get in line of fire of several ALEPH troops guarding that side. He throws smoke and is successful, blocking the incoming shots.
With smoke blocking the view, the Hunzakut gets up and runs over to the tech coffin. A few orders later, she has a supply box and is tucked away on my side out of harms way while also throwing down a repeater just in case. I then activate my Zuyong/Rui Shi Haris and get them into the fray (Rui Shi is a lieutenant, that token was just to show who the fireteam leader was).
Rui Shi + Fireteam + smoke was super mean. I was throwing 5 dice down that lane, usually looking for 15s while the opponents could only dodge or try pathetically to shoot back. None survived his onslaught and he eventually cleared out that entire lane including a very sad Patroclus.
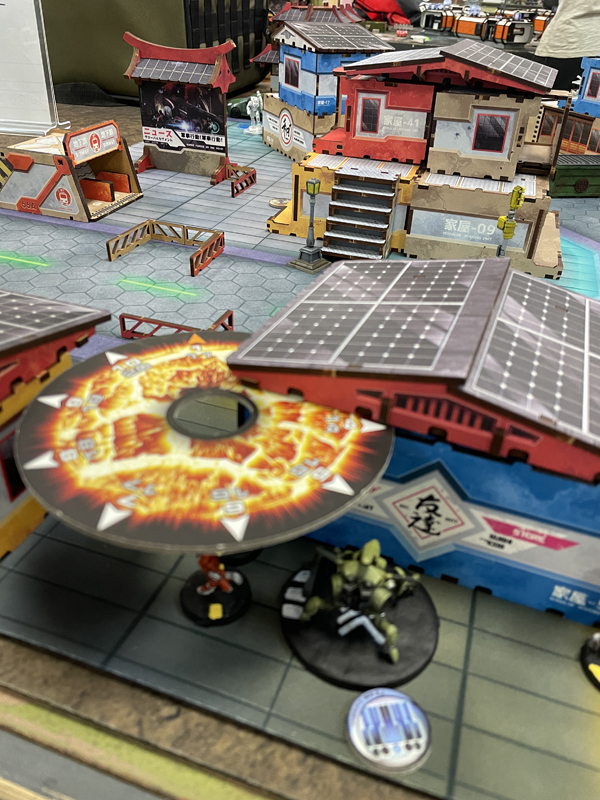
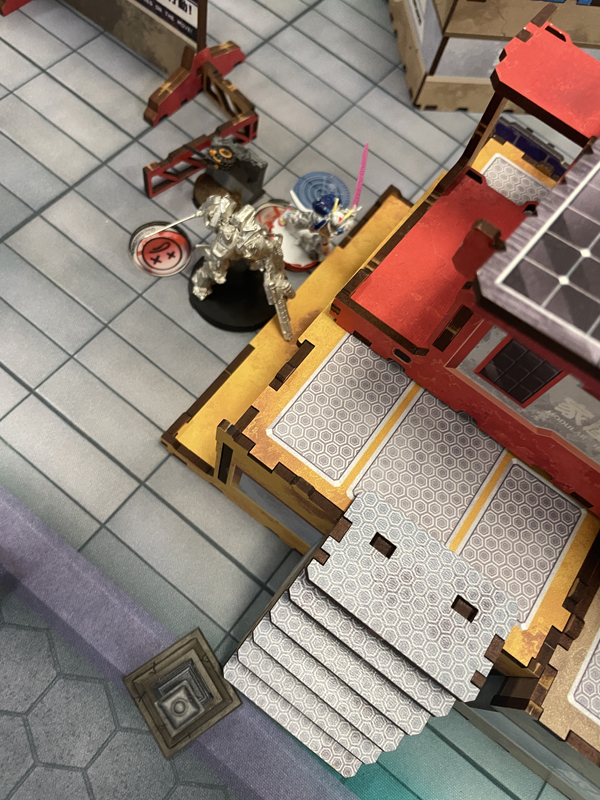
With my remaining orders, I had Gromoz chuck a repeater out near the Garuda and hack it, isolating it from command. With the damage done, I retired the round.

ALEPH wasn’t going down without a fight. The Garuda tries to shoot across the board at McMurrough but fails and I immobilize it with Gromoz. Afterwards, the shot was seen to be just a feint. McMurrough didn’t want to eat a bullet to the face so threw smoke (since it is better than the dodge action). Throwing smoke then blocked their sight line and allowing some sneaky ALEPH troops to get through.
Their killer hacker went into Cybermask (making it look like an impostor that I’d have to discover to actually start shooting). I realize now that the list I guessed at is still pretty off as I didn’t list the killer hacker lieutenant this model ended up being. She made it all the way up, snagged a supply box and then booked it over to mess with my hacker.
The Killer hacker comes in cautiously to avoid my Zuyong guarding parts of that street. She comes through my repeater net and kills Gromoz. I tried Isolating her but failed to get the rolls and the killer hacker won the engagement. Not wanting to just give me a supply box (because the hacker can only carry one at a time), the lieutenant retreats to the back side of a building to cover the inevitable rush.
My Haris walks through the Teucer’s Feuerbach fire lane, shooting the whole time. A Myrmidon thows smoke but eventually I’m able to bully through their defenses and take both Teucer and the smoke thrower down. Safely across the street, I set my sights on the killer hacker.
My haris is too much for the hacker and she goes down. I have enough orders to run Rui Shi up and secure the supply box.
I missed it that this would put a myrmidon in sight and the resulting unopposed shot clips Rui Shi and it goes down. That ends my turn and ALEPH starts round 3.
This turns out to be the last activation as I’ve done so much damage that I put ALEPH into loss of lieutenant and in retreat. The game will end at the end of their turn. With four command tokens left, ALEPH spends it to keep one unit (the Myrmidon) from going in retreat and fleeing the board, and converting the two irregular orders of the netrod to regular to help give the Myrmidon a fighting chance.
With the remaining orders, the lone ALEPH model on the map runs over and has just enough orders to crawl over Rui Shi and snag the supply box. I whiff a dodge roll to try and get closer as the unit rounds the building so it is down to pistols. Both Zuyong open fire and I get one hit in. Myrmidon needs to save to keep control of the supply box but the dice fail him and he rolls a 1.
Dahshat Wins! 4 – 0
Game 2
Still running the same list and doing supplies, I now face PanOceania’s Winter Force. My opponent wants to play around with silly expensive haris teams so brings the following:
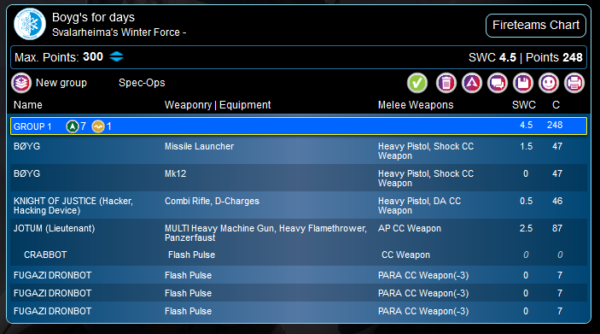
I win the roll off again and choose deployment, forcing him to deploy first. He chooses to go first as well.
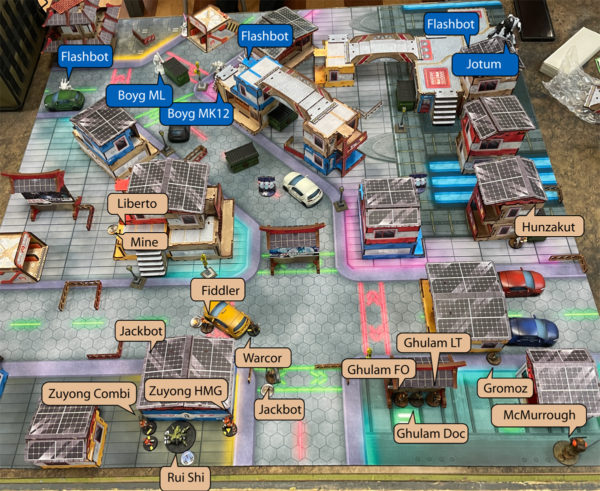
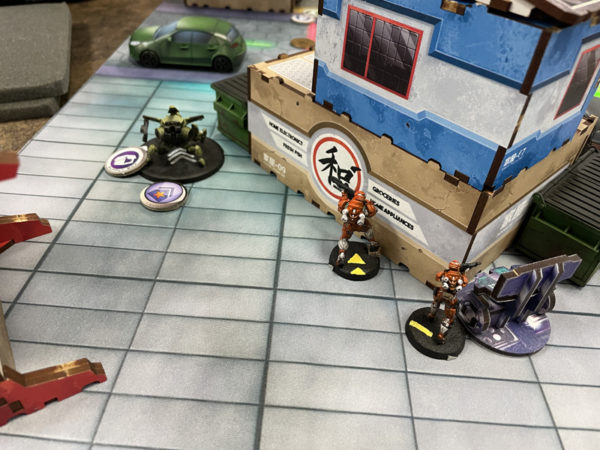
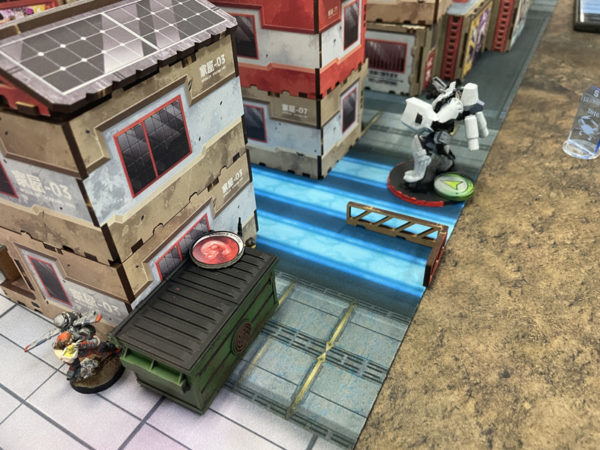
He held the Jotum in reserve (and I didn’t know it was in his list) and I held back McMurrough. This time I had Fiddler far away from her bots (as well as anyone else away from them as well). We rearranged the board so it wasn’t so penalizing in the deployment zone and we added more sight blockers in the roads. Jotum came in on that far right side and I counter deployed McMurrough to deal with him. That poor Hunzakut was going to be very exposed when that Jotum comes knocking.
First things first, Jotum starts by coming down the lane and discovers on my Hunzakut camo. It was successful and poor kitty has nowhere to hide. Jotum comes marching forward. With her doom clearly at hand, she dahshats herself and poops out a repeater. This give Jotum a good pause because the repeater won’t be down until the end of the activation so he can’t shoot it. Instead he does just barely clip the sight line of Gromoz as I carelessly left her out too far in my set up.

Jotum takes the shots at Gromoz while she dodges for cover. Hunzakut is safe for now. Gromoz fails the dodge and is hit twice but miraculously make both saves and she ducks out of sight. Jotum is not in a great spot now as Gromoz is one of the best TAG hackers in the game and he dead on in her repeater net.
WinterFor decides to switch gears and hit the other side of the table. The Boyg Haris moves out and around. For a brief moment, a silly Warcor could have spelled disaster with a stunning flash pulse but the lagging Boyg tanked the shot and they moved on.
Instead the Boyg’s had different prey in mind. I chose the wrong side for Rui Shi to hug when I deployed and he got caught in a 3 burst missile launcher blast. I dodge with the main target, the Zuyong combi which allows Rui Shi to dodge as well if it hits. Oh man and did it hit. Double crit from downtown means Armor Piercing + Explosive + an extra damage. Twice.
Eight armor saves later, there was nothing left but a crate in the ground where my Zuyong and Rui Shi where a few seconds ago. Honestly, a blast like that should have knocked the other Zuyong off his feet as well.
With validation in hand, the haris continues pushing forward as their real prey is Gromoz. There is very small window of sight where the Boyg missile launcher can still catch her now that she moved closer that way. Time for the Liberto to arrive! He pops out, knowing the Boyg has to double move and not retaliate in order to have enough orders to get that shot on Gromoz. His light shotgun actually puts a wound on the Boyg, catching a gap in the armor.
The Boyg makes it and fires all three shots across the board and into Gromoz. At the same time, I have everyone open up on him. The Liberto shotguns him, the mine triggers, and Fiddler shoots with her contender rifle from prone. Gromoz dodges and all the shots go wide as Gromoz hits the deck! The gambit does not pay off and somehow Gromoz is still alive by the end of the round. After all the shots are fired, it ends up with Fiddler’s contender striking home and delivering another wound, knocking the Boyg unconscious.
Starting off down two units, I again push the Ghulam infantry into my main order group (this should tell me that I’ve set them up completely wrong). I’m out of command tokens but flush with orders. I start tackling the big guy and run a hacking routing to try to take control of it. I get two good hits in (because Gromoz has burst 2). That is 4 saves on the big guy but he passes all of them. I try it again and only get one in and he passes both saves again.
I only have four regular orders left so I’m getting to the point where it will be useless to control him as I won’t be able to feed him orders to do much before control inevitably is released on my opponent’s turn. I give up on Jotum sadly and focus on the other side.

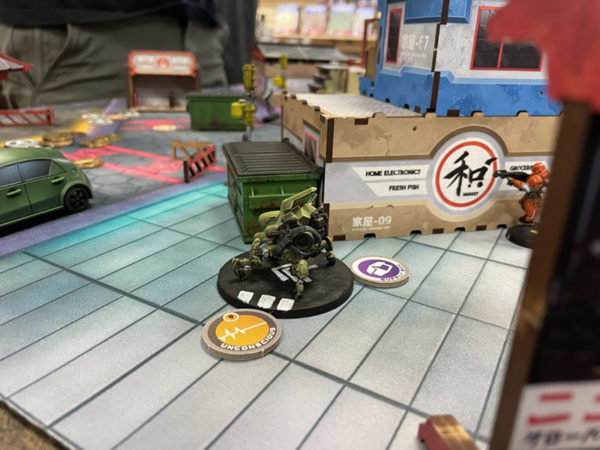
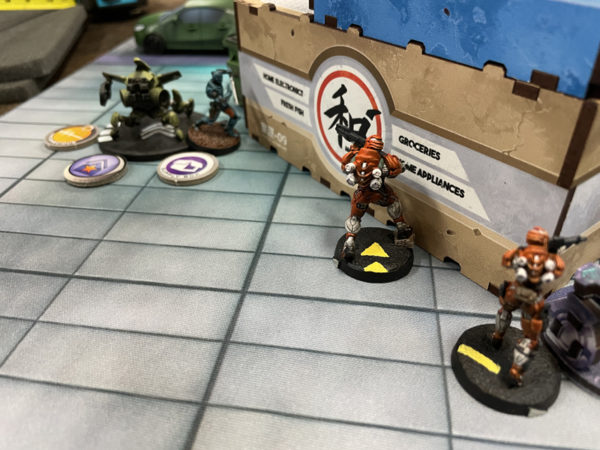
The Liberto and Fiddler start messing with the remaining Boyg Haris team. Liberto goes down but Fiddler and her bots do good work, wounding the remaining Boyg and setting up a pretty good defensive position. I move my remaining Zuyong out to start getting him into good cover fire range and set him into suppressive fire. McMurrough also starts moving out and smoke dodges a passing shot by Jotum. Hunzakut stands as still as humanly possible hoping Jotum just forgets all about her.
WinterFor starts off with the Fiddler situation. The jackbots and Fiddler keep hammering away and eventually kill off the second Boyg and wound the Knight of Justice before Fiddler dies. Very disappointing for WinterFor. That battle was pretty epic with crit shots and count crits, epic saves, and disappointing misfires.
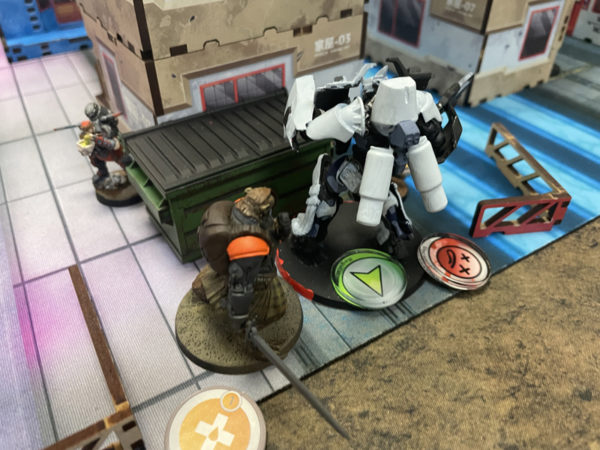
Unfortunately for Hunzakut, Jotum did not forget. He moved out and, being trapped with no other option, she goes full out polecat mode. She dodges into get to close combat with the metal monster. The responding flamethrower nukes the repeater but kitty makes her dodge and grabs onto Jotum’s leg, holding on for dear life.
Gromoz gets a final hack attempt but fails again and now the repeater is down so it doesn’t matter. Hunzakut just won’t quit though! Jotum has to CC attack her and he flubs the roll while she succeeds with her pistol. I imagine he just can’t get his arms low enough and she has the pistol at point-blank range against one of the knee servos firing madly. Jotum easily makes the save and this continues another round until he shakes he loose and stomps on her, knocking her unconscious. She did her job though… she burned enough orders to have McMurrough repeatedly dodge forward at Jotum and burn through the rest of WinterFor’s order pool.
I send McMurrough in and he takes a flame shot on the approach. I don’t take the bait and berserk in because Jotum has too many structure points to trade wound for wound and McMurrough should easily beat him in straight CC rolls. True to form, he does and but only gets one wound in before my order pool starts to run too low.
There is an actual mission at play here but the battle has just been so in-your-face, I haven’t had a chance to focus on it. With Jotum tied up, I use my remaining orders to get Gromoz out and grab a supply box and then scoot her over to be able to hack Jotum directly as he and McMurrough hammer it out.
WinterFor seems to realize this too so at the top of round 3, he runs his Knight of Justice out and picks up a nearby supply box as well. Being PanO, it does take him an extra precious order to do this as the thick armored gloves fail the first time.
Not good enough to leave Gromoz alone, the Knight of Justice runs out and is able to get a shot off on my hacker, taking her down as she finally fails a dodge and save. Jotum tries in vane to hurt McMurrough but only gets another wound for his trouble.
I use my turn to finally end the Jotum nightmare with McMurrough.
I leave enough orders to get McMurrough to the fallen supply box in case this last gambit fails. I use my remaining orders to send out my lone Zuyong HMG and fire on the Knight of Justice. I only have one opportunity, sprinting full out to get a shot on him.
One hit strikes home and Knight of Justice fails the save! He drops the supply box as he falls unconscious.

With the remaining orders I left behind, McMurrough runs over to the supply box and grabs it for the Dahshat employers. Hope it was worth it!
Dahshat Wins! 4 – 0
With these games on the books, block 3 has just started. We still have two more weekends and I’m excited to get a few more models painted and hopefully try out a motorized bounty hunter in the Acquisition mission.