
With my catalog of painting faces through Infinity models, I found I had another face to paint up before jumping into a lot of helmeted heavy infantry. I decided it might be fun to show the successive stages of how I was painting faces now, using the LazyPainter technique.
To be clear again, this is not my technique, just what I gleaned from the LazyPainter and how I apply it. This is likely a silly redundancy from his article but it was a fun experience shooting the photos and seeing the technique in various stages.
I’m working strictly with the same paints that were recommended (all Games Workshop Citadel paints):
- Lahmian Medium
- Seraphim Sepia (Shade)
- Agrax Earthshade (shade)
- Reikland Flesh (Shade)
- Druchii Violet (Shade)
I think the part that got me to try this technique for the first time was that I had all these shades from painting up Archaon. GW can be expensive but with the amount of paint you actually use, you will likely have these pots dry out before you use them up. They could easily get you through a 1000 faces.
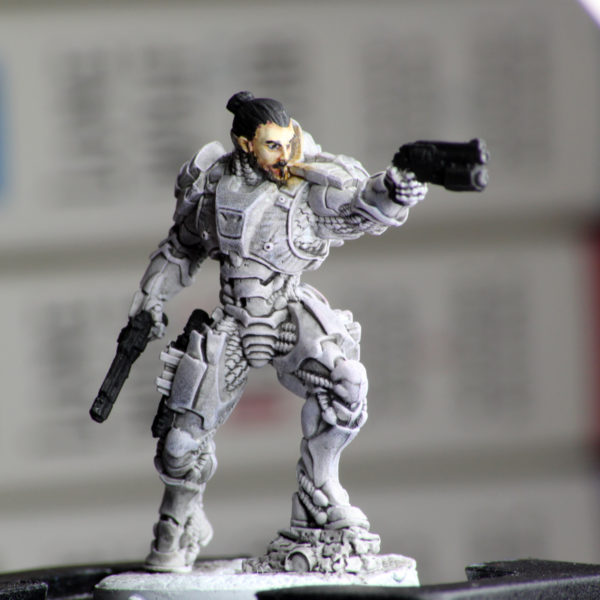
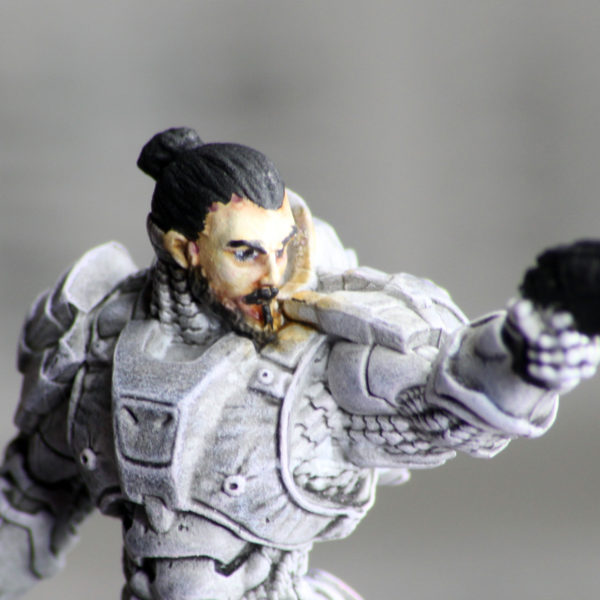
To start things off, I have Krit Kokram from Infinity. This isn’t actually a b/w photo, he’s just been primed white (I use Stynylrez white primer with my airbrush). I shaded him in a heavy dose of Nuln Oil but left the face alone. That shading is part of a different technique that I use on these guys and has nothing to do with painting faces so I leave his face white.
I decided to flip things around a little bit and that is to color in the hair, eyes, and eyebrow/facial hair first. I did this mainly because it was going to be black for this figure and the washes shouldn’t mess with things too much. I can clean things up later but it will be easier to get this “right” right now and do any clean up with white before getting into the actual face toning. Cleaning up after we tone things can be quite frustrating.
One last note before we begin: This is for light skin-toned models. I don’t have a formula worked out for darker skin tones yet. When I work that out, I’ll try to post that up.
Now we’re ready to truly begin. Using a rough 50-50 split of Lahmian Medium and Seraphim Sepia, we load up a small small brush (I’m using a 1/O) and wash the whole face. If it starts to pool too much here, I’ll clean the brush and wick it away. This might pull too much away but just go back over the drained area and repeat the process as necessary. This actually takes the longest and is the only part that you may need to let dry. In Colorado’s dry climate, this took less than 3 minutes.
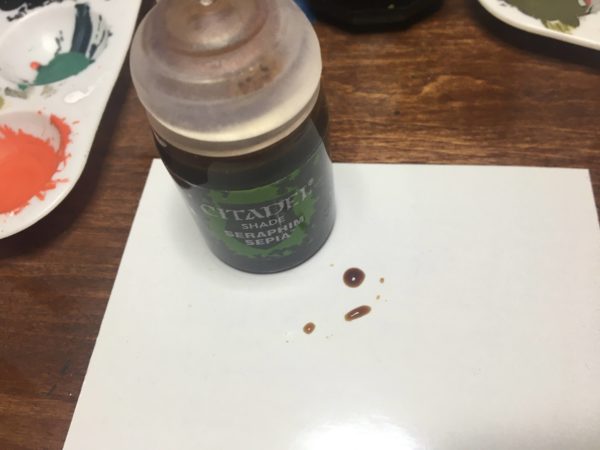
Remember that you are going to need very little paint here. The splotches above are just two wicks of the brush from Lahmian Medium and Seraphim Sepia and mixed. I probably lost more paint cleaning the brush than I actually used on the face.
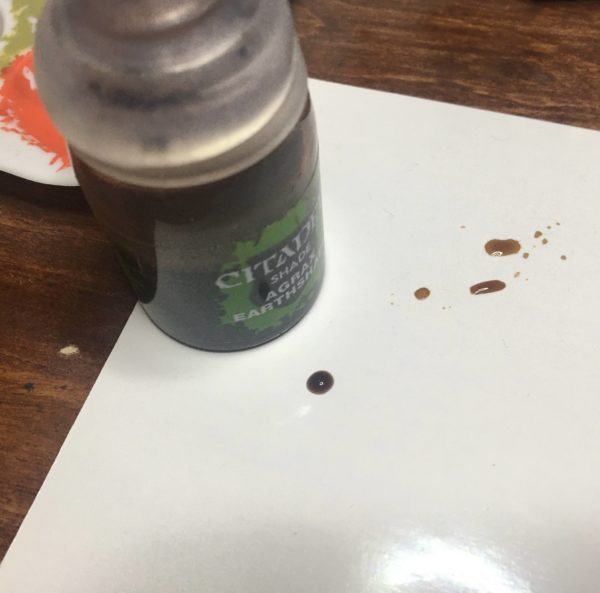
Now we’ll use the same mix ratios for Lahmian Medium and Agrax Earthshade (1:1). You can see this time I used even less because, as you can see from my Sepia leftovers, I hardly used any at all. I probably could have lined up 5 more figures to wash in that Sepia.
Now we start to get subtle. We are not throwing a wash over the whole mini any more and instead are doing a “controlled wash” as LazyPainter puts it. I find that I’m not really doing even a wash anymore, just highlight painting with a glaze. This is where I tend to screw up and go overboard. Agrax Earthshade, even mixed with Lahmian Medium at 1:1, is still potent.
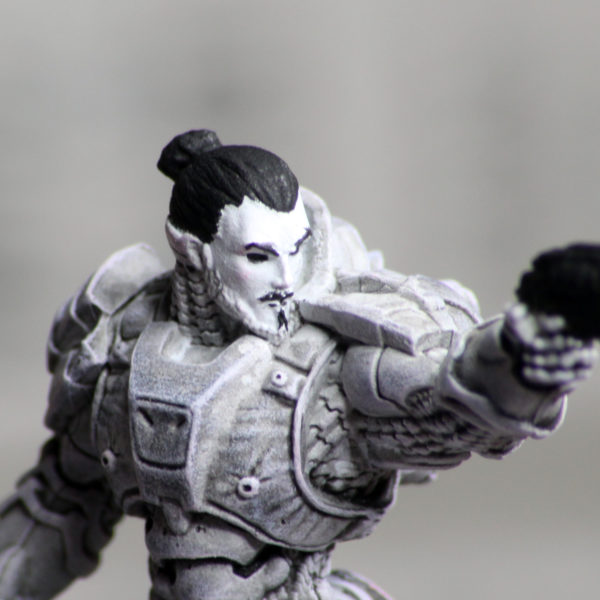
I go around the edge of the face where all the hair or clothing/armor meets. I’m still using a 1/O sized brush but just dabbing in places after the “outline” pass. These dabs will be kind of large but that is ok. We’re doing the eyes to shadow them. Then under the nose or sometimes around the whole lower part of the nose as well as that triangle that can extend outward under the cheeks. Then get into those ears and you’re basically done. Again, this does not need much and you can quickly overpower things and darken the model beyond where you want to go. This might not be bad as I was getting some interesting darker tones on some models. Just be aware that if you go dark with this level, you may want to go back to the Sepia and knock down the highlights to keep the model in the same tonal range.
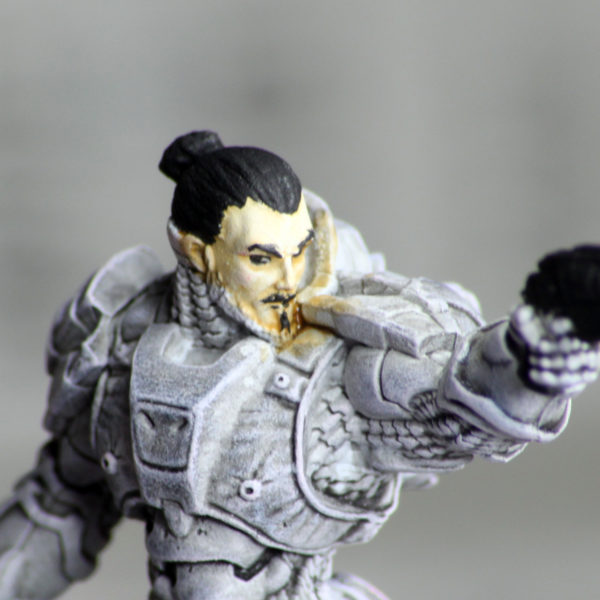
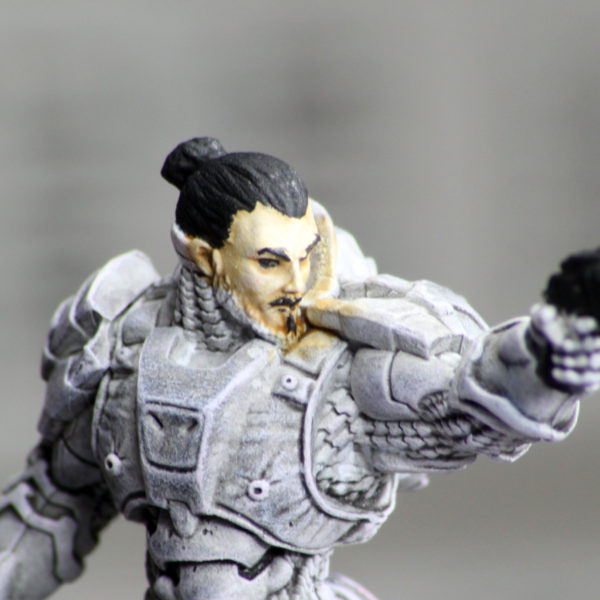
At this point, we’re giving the model some warmth with the Reikland Flesh. I switch brushes at this point to a 3/O but only because my 1/O and 2/O tips are getting a little frayed and I want a lot of control here. You no longer need to mix Lahmian Medium but can go straight from the pot at this point.
You are basically pulling very little wash onto to the brush at this point. I use the little pool that forms in the pot lid and then wipe it off until I’m not seeing paint come down (probably 3-4 little wipes). Then I go to the model and I’m spot highlighting at this point. A thin line around the face again but tapering off as I go higher. Maybe some spots in crevasses near the hair’s finer points and then move to spots like the eyes again and under the nose and chin. You likely won’t have enough paint on the brush to do real damage but still be careful. You can see I a bit of pooling or overpainting near Krit’s stylish chin dagger. I’ll clean that up when I touch up the black hair parts again so I’m not too worried.
Now to the last layer, Druchii Violet. This probably isn’t really needed but I like it so I follow the same process as the Reikland Flesh. Get very little on your tiny brush and spot sections where the light would create the most shadow. I spotted the chin again and hit the eyes one more time as well as some points around the outline of the face again.
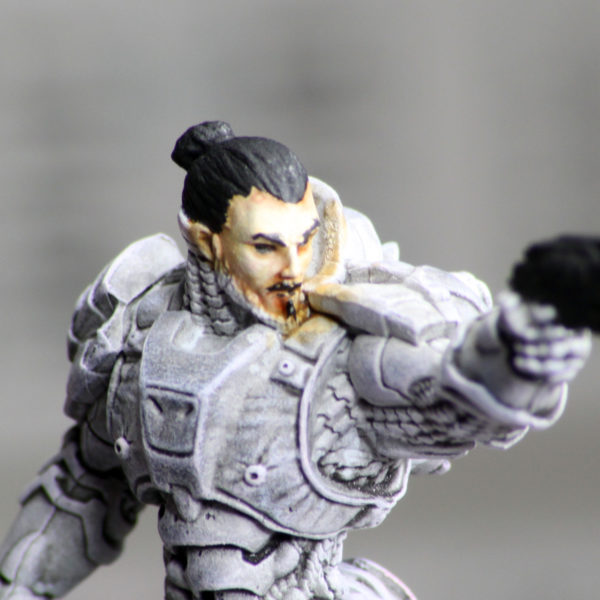
With the black work we did before we started, this face is easily done for tabletop play (even overdone maybe with that last step). But we’ll push forward and complete the eyes and retouch the hair.
I’m really not sure what is going on with the thing around his chin. I couldn’t decide if it was more hair or part of the inner lining of the suit to comes up all sci fi-style around his chin. I guess it was a beard seeing that it wasn’t smooth. I hit it with a full dose of Nuln Oil to hedge my bets. Still using a small brush (3/O) and not loading the bristles up with any more than what I want to paint with. With this small of detail, I’m not using the paint as a proper wash.
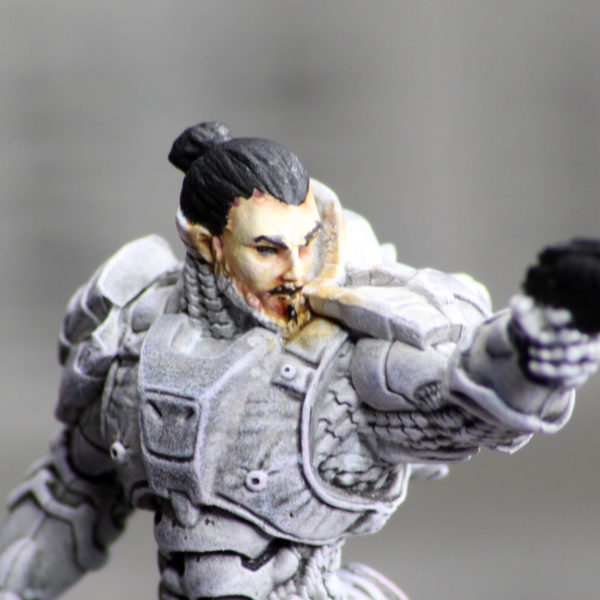
With the black hair done previously, the touch up was quick and helped give reason for the excess Reikland Flesh on the chin. The eyes had most of their work done already when I blocked them in before we started. To finish them out, I pulled my white out (Vallejo Model Color “White”) and mix with 2:1 water to thin it out. I’m going to need a lot of liquid in my bristles to get it to flow on to the surface but very little actual paint. The tip is going to dry out a lot in this process and I’ll fight back and forth loading paint and then trying to wipe it down to focus it on the tip and not have it release a bunch of paint, ruining everything. In the end, it is better to be too dry and start loading the brush again than too wet and ruining everything.
The key is to take your time, use plenty of light, and brace your hand and model as best you can. With the black already in place, just feather touch the brush tips to the corners of each eye, slowing building up color until you get some white to show. In my case, the white brushed a little too far into the eye and I lost the “pupil”. With the black, watered down again and lightly loaded, I touched the eye in the center. The center should be pretty well defined with your white so not giving the model a cross-eyed or goofy look should be easier. You do not need much to create the effect and too dry is better than too wet.
And that completes Krit’s face. I’ll go back and highlight his hair and awesome manbun with some cool tones to complete the head and then slop on the rest of the paint to finish him out.
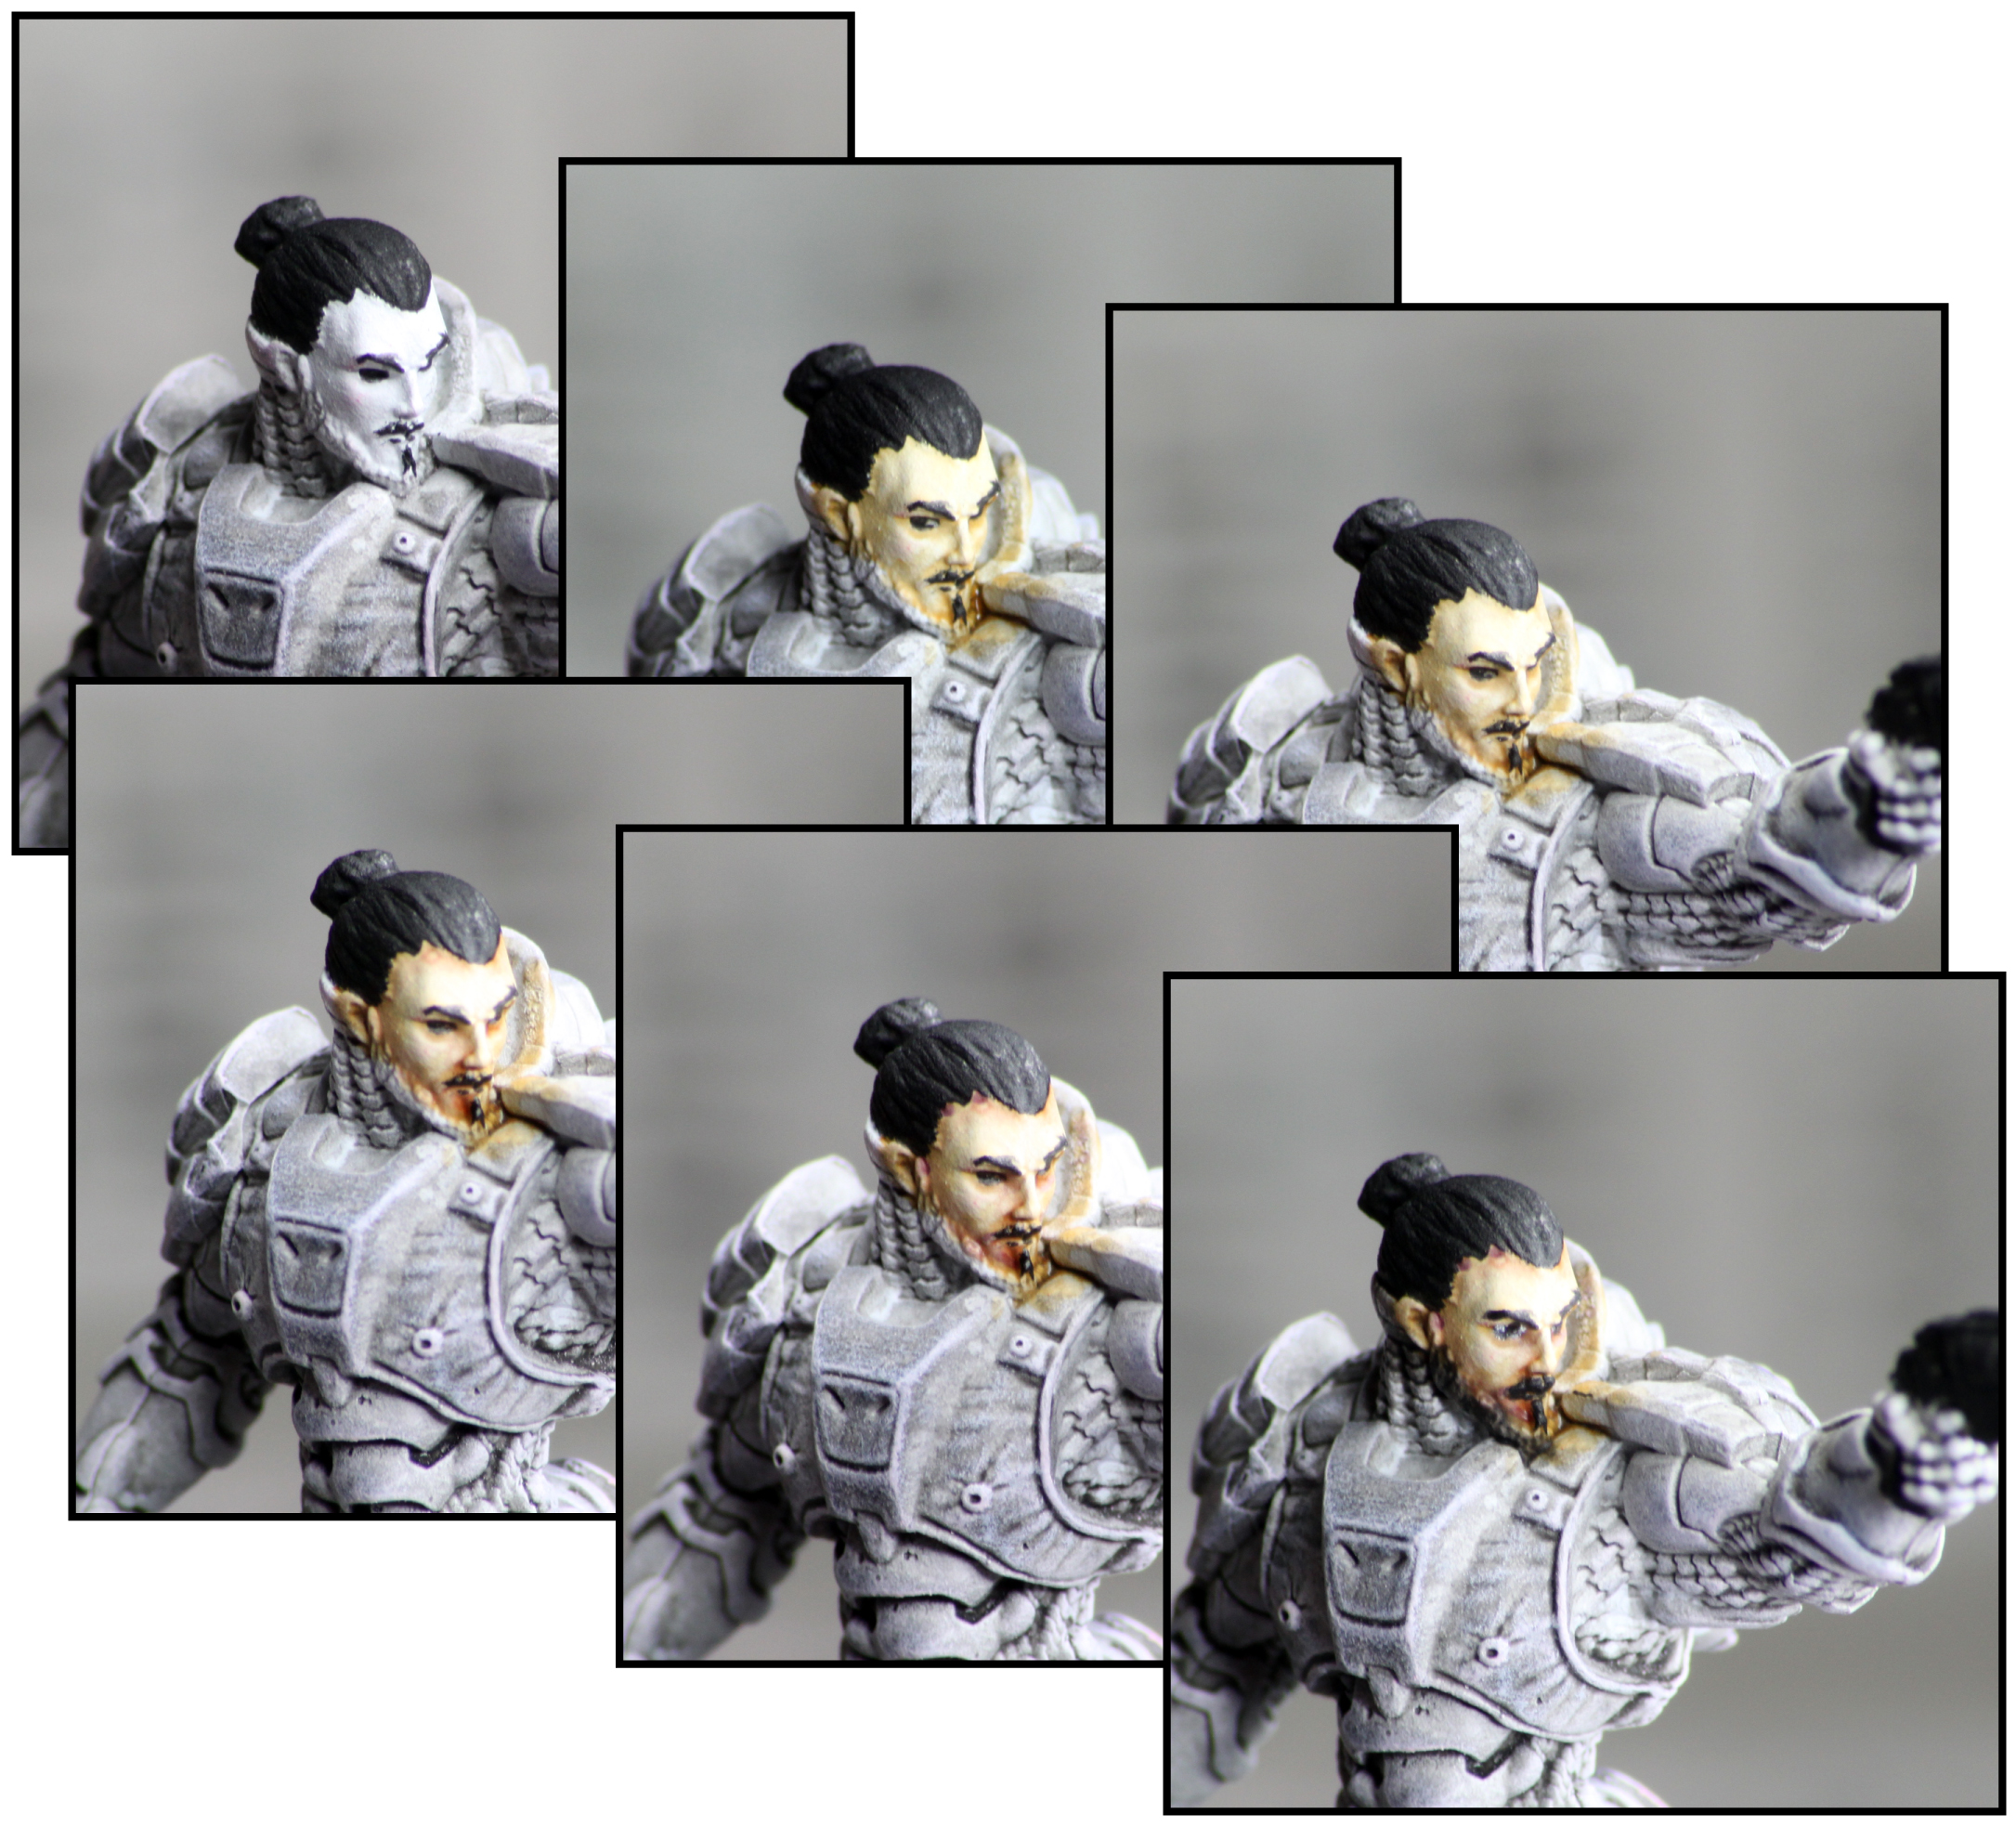
With the instructions and commentary going on, it may be hard to see the progression of the model as it scrolls through the whole post so I have the full process compiled above.
I hope this helps show the process in more detail. Start to finish, the “tonal part (photos 2 through 5) was about 15 minutes. This included pausing for photo setups. Photo 1 took about 5 minutes to go from completely white to blacking out the hair and eyes. The final eyes took about 10 minutes. You aren’t doing much actual painting so take your time and take a break give your brain or nerves a break.