
With my latest Paint Challenge in full swing, I’ve started up on my mission to paint up two playable skirmish forces in one of several Old West-themed miniatures games. Like I’ve done with several other genre minis games like Walking Dead or Test of Honour, I love the monochromatic style of painting so I’m continuing that tradition for these games as well.
When I started my black and white monochromatic adventure, I used only two paints, craft store white and black (the same black you see pictured above). All my shades were then custom blends of those two. To make things quicker, I bought extra bottles and custom mixed some shades to use as well.
With black and white, grey shades are actually quite challenging to match (ask anyone who paints house interiors). Greys can run the gamut of purple to blue to green and so mixing shades straight more my black and white source meant that all my shades would be on the same spectrum (they usually ran bluish).
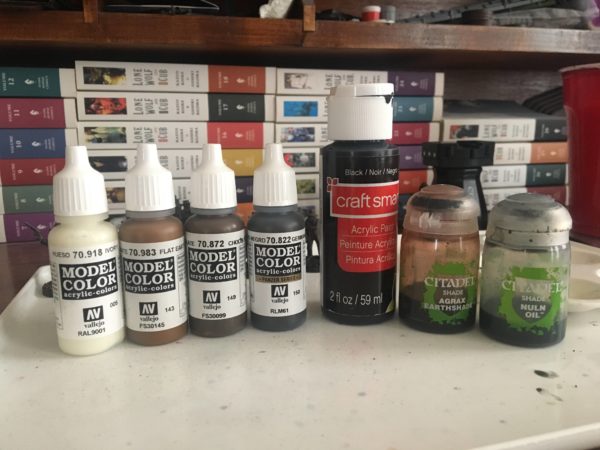
With sepia tones, I was less worried about that so I bought a range of colors (actually found from another site years ago but my google fu failed me and I can’t source the original author’s color scheme). They are primarily Vallejo Model Colors and GW Shades.
- Model Color 70.918 Ivory White
- Model Color 70.983 Flat Earth
- Model Color 70.872 Chocolate Brown
- Model Color 70.822 German C. Black Brown
- Craft Smart Black
- Citadel Argax Earthshade
- Citadel Nuln Oil
- Stynylrez Primer Ebony Flesh (airbrush)
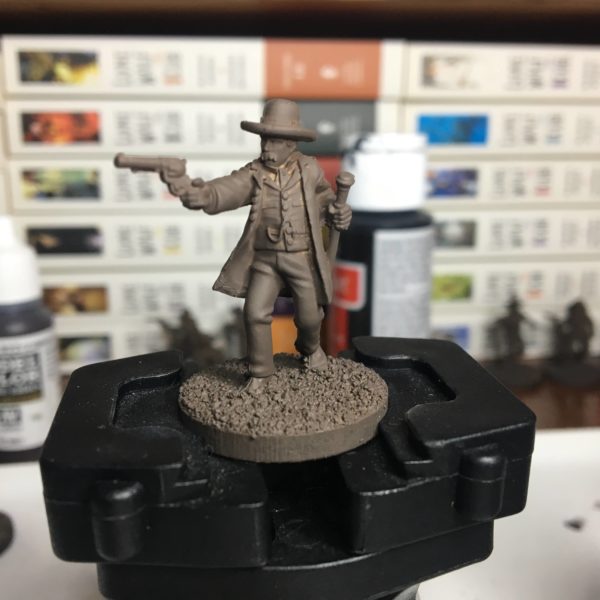
To start everything off, I prime in Stynylrez Primer’s Ebony Flesh.
Because I don’t want to sit around watching paint dry, I cover the base texture in a good helping of Nuln Oil.
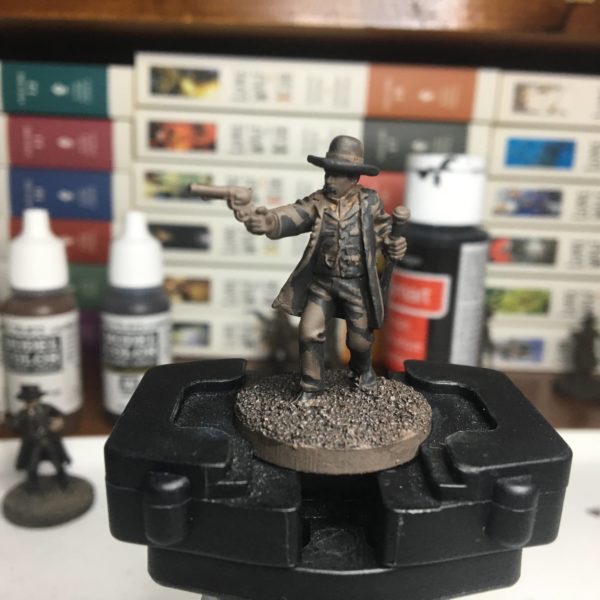
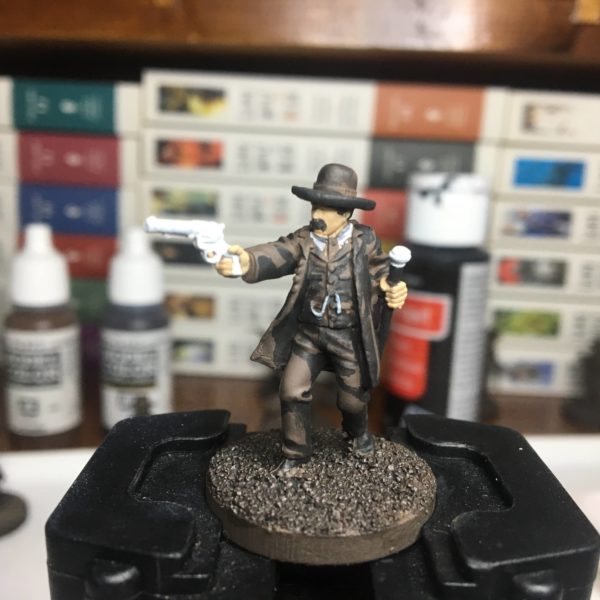
While the base wash is drying, I start in on the black shading. I’m really looking for values and contrast at this point, creating deep shadows and trying to complete the tone for the figure’s mostly black attire.
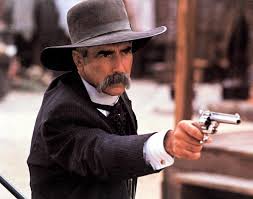
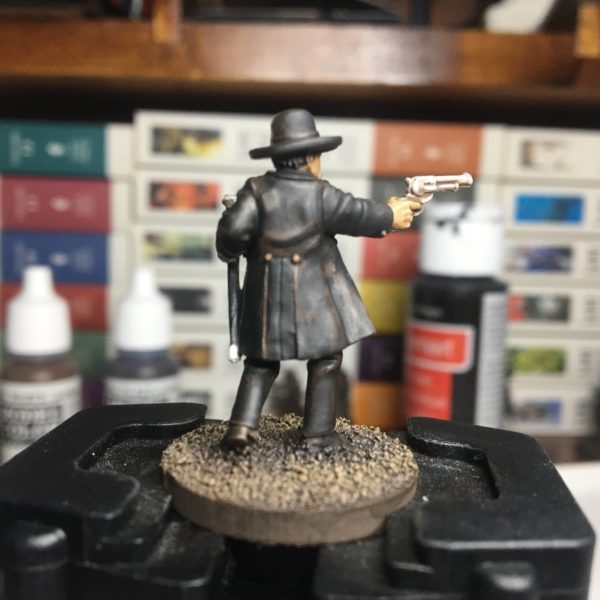
The inspiration for this figure is from the 1994 Tombstone movie with Sam Elliott playing Virgil Earp. As with most of the heroes of the film, they are almost all dressed in dark blacks. I don’t want the mini to just be a solid piece of black so I’m leaving the primed dark ebony tone to show through for depth.
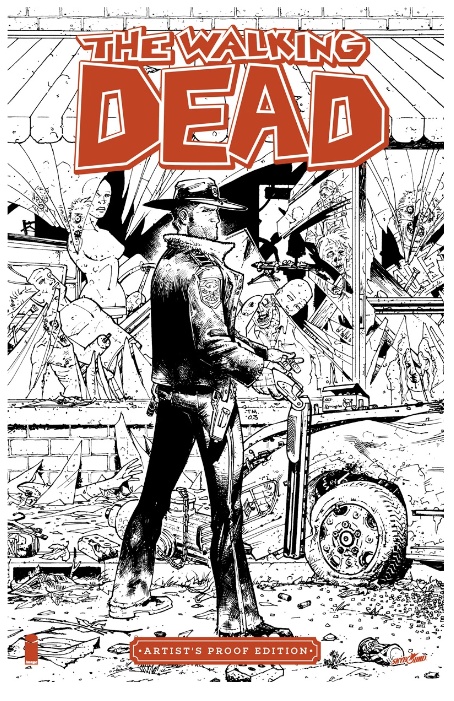
The concept is illustrated further with this “artist proof” example of the classic Walking Dead issue #1 cover. I’ve used this before in my “Inked Style” for the Here’s Negan board game but the sketch results here hold true for fully painting the mini as well.
The dark police coat Rick Grimes is wearing in that cover is emphasized by the deep shadowing of the inking and still leaves a lot of white space for highlighting when the proof will go to the toning or coloring phase. Since I’m using the black at full strength (remember to thin with water or flow medium), I only want the parts of the model I completely want blacked out.
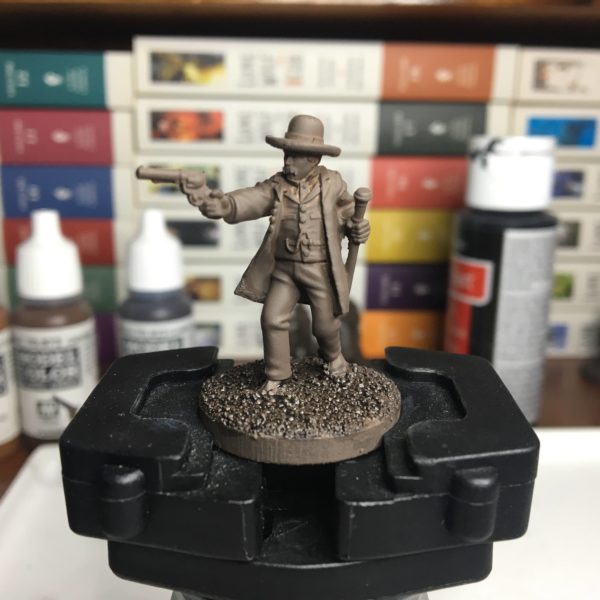
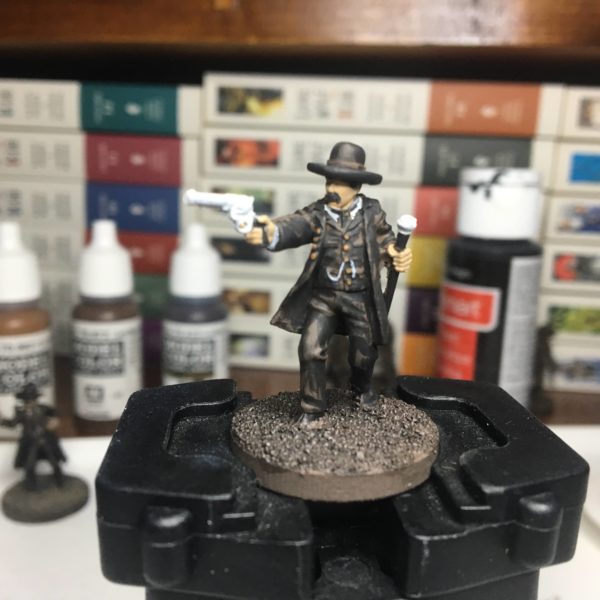
Now we get into making the model actually take form with the start of the skin tones. I don’t usually go nuts here and I heard an interesting comment where there is usually two ways to do skin, either ramp up the details and blends and paint them like an oil painter would take to canvas or slap on a tone and hit it with Agrax Earthshade. There is no in between.
You can take that extreme view with a heavy dose of salt but I do find that the harder I work up on skin tones, the less appealing the mini is. I think I haven’t “broken through” yet to that next level of blending and tonal control to pull off amazing skin tones (or I lack the patience to glaze and glaze and glaze). So with Virgil here, I blended 2:1 Flat Earth: White Ivory to get a light tone. I think I could have gone a lot lighter as the eventual Argax Earthshade will knock this down quite a bit. The beauty of all of this is that the shades you mix are going to be custom and that will add to the variety of your minis group. Having some darker or lighter than others will enhance the overall effect of the group.
With the skin done, I head over to hit the brightest objects, namely the silver pistol, the white shirt, and his accessories like the pocket watch and cane.
With most of the base coating of the mini complete, I turn back to the black and give a good dilute of water or flow improver. I’m wanting this to blend or glaze over the dark areas to build a transition from my earlier hard-edged black base coating. This brings the darks a lot closer to the Artist Proof image I have above wear the lightest highlights are relatively small.
As with most glazes, this will look like it goes on dark but will dry a bit lighter. I actually found that painting in “scratch strokes” similar to the “X” lines going on in that Artist Proof to be very effective. The lines tend to bleed into each other with the glaze but still breed some good depth.
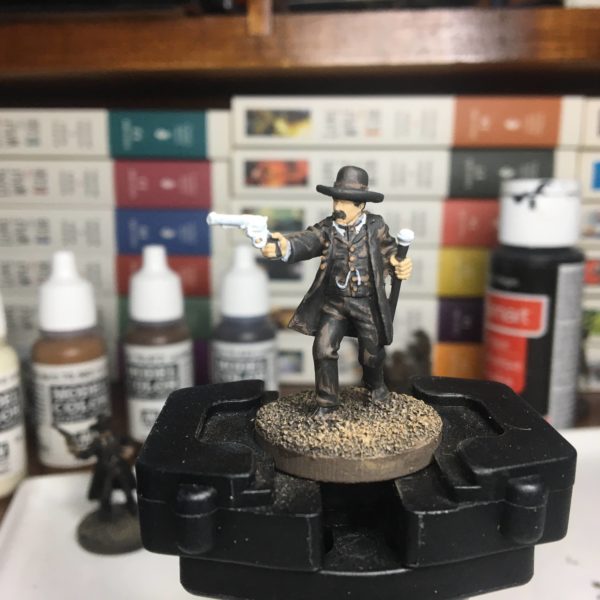
The glaze is pretty wet and I want it to dry so I can see where I need to add more or clean up so while that is happening (and sometimes in between the clean up), I grab my dry brush and hit the skin tone paint I created and brush in the base texture to give us that illusion of western gravel/sand that the figure will spend most of his life trudging through.
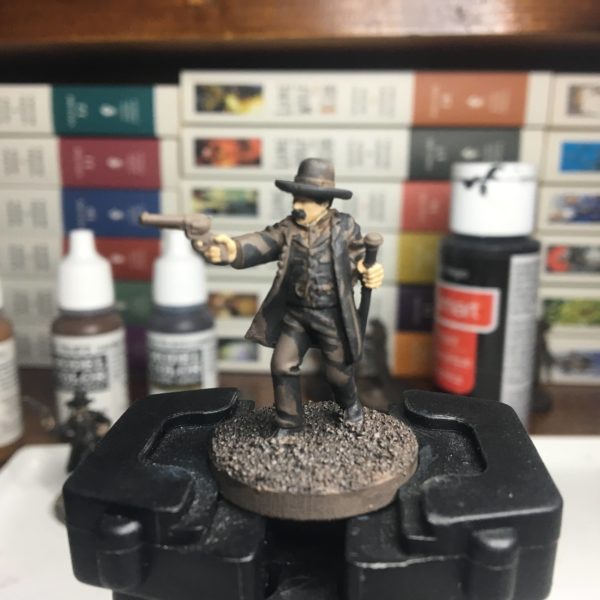
With my dark glaze dry and my base dry brushing complete, I hit the whole mini (sans base) with a good dose of Argax Earthshade. You’ll need to let this dry completely before moving on so this is longest part of the whole paint session.
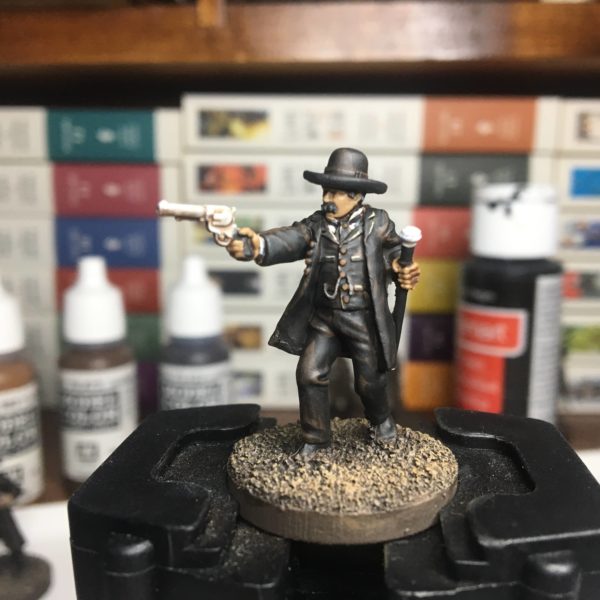
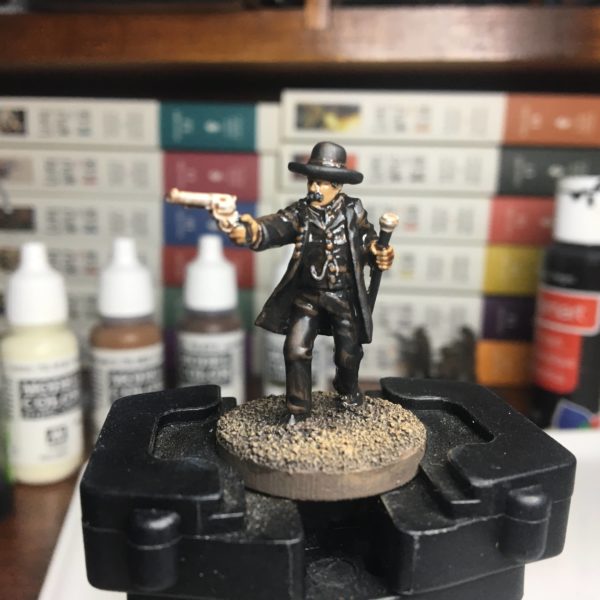
With the wash dry, you can evaluate anything else you want to clean up. At this point it is usually just some final highlighting. The wash destroyed my inner white collar shirt so I wen back over those areas (carefully as it’ll be hard to recover mistakes at this stage). I also cleaned up the gun a little more and the silver parts of Virgil’s cane. Lastly, I did some very light edge highlighting with some thinned down Flat Earth on things like buttons and pockets and the dark collars. You don’t have to go nuts here, just so minimalist edges to give the faintest impression of depth there. Oh and I grabbed my Ivory White, thinned and almost dry on the brush to give Virgil his “salted” ‘stache and hair. He is the older brother, after all.
The Agrax Earthshade really blends all those hard and softer black strokes we did earlier so don’t worry if things look unnatural in those early stages. It will all work out in the end.
I didn’t need the German C. Black Brown or the Chocolate Brown this time around but the model is very dark in most of his scheme so it wasn’t really necessary. I did use a bit of the Chocolate Brown and German Black Brown in helping to make Wyatt’s Colt Bluntline Special become more than just a black pistol. The German Black Brown is dark enough it could almost replace the craft smart black I have so I think it will see the least use but it helped base coat the pistol and bring it a different feeling.
That wraps up the guide here and I hope this helps if you ever decide to take the plunge into monochromatic painting. The techniques here can easily apply to black and white as well but you’ll be mixing custom shades all the time so a wet palette is your friend (which I should invest in at some point as well).