
Ok, some kid game humor with some bad dad joke flavor mixed in. But! I did want to talk about the new maze I made. We have Frostgrave Friday coming up this week and we’ll be journeying once again into the frozen wastes, this time to The Haunted Library…
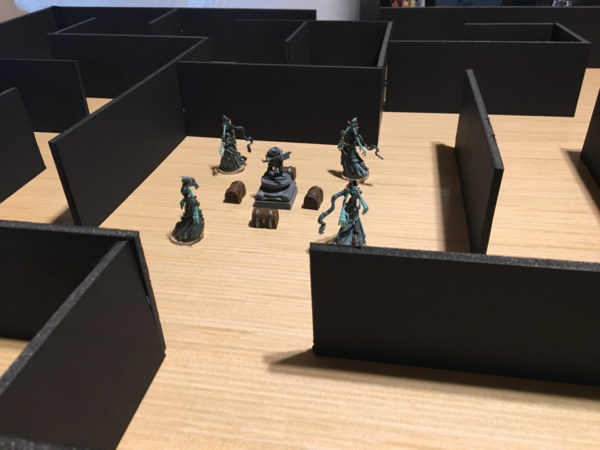
So there are two interesting scenarios in the core Frostgrave book, one dealing with wraiths (which are totally fun) and the other, a massive underground library. I combined the two for our next session and have the wraiths I painted up a few weeks back, added to a labyrinthine maze, to create a unique Frostgrave map to fight over.
First, I needed to make this up quick so I couldn’t exploit the great 3D walls Colton and Reese have been creating. Second, I needed to do this on the cheap as I don’t know what I’d do with a bunch of cheap maze walls afterwards. I decided foamcore was the way to go and found a school display package at Wal-Mart for $10. Cutting this up would be cheap and easy, fulfilling both needs.
Next, I needed to sketch out my maze. Looking around online, I found a cool little free random maze generator. I fired it up and made a maze I could create without having to create thousands of walls.

I eventually made some edits to make openings on all four sides of both the central chamber and the starting outside edge walls. I wanted a 3′ x 3′ map and 4″ wide halls so I scaled it down on the settings to 9 cells by 9 cells with a 3 cell by 3 cell inner area. When multiplying this out by 4 inches, you get the 36 in x 36 in area we need. This also let me go easy on the number of walls I needed.
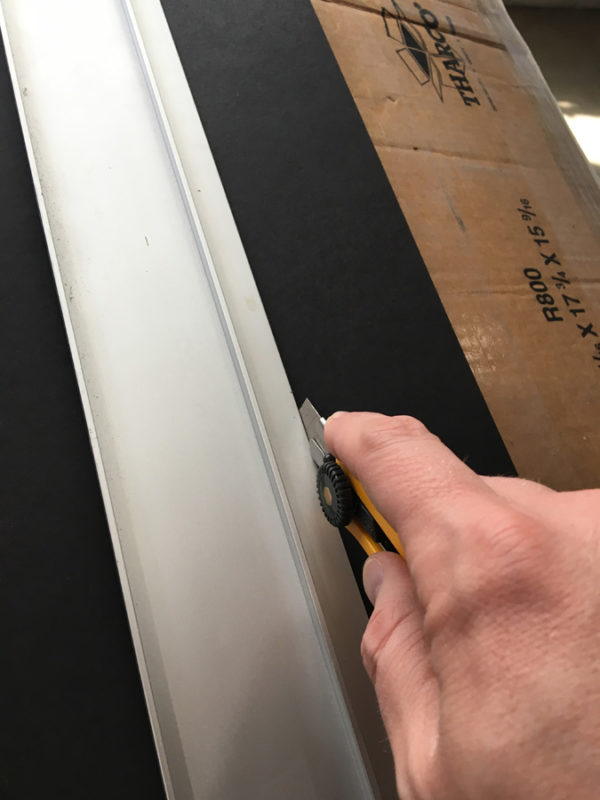
The school project set was already 3′ tall so I cut them into 3 in x 3 ft strips. Clamping a straight edge (pictured is one designed for circular saws), I took a sharp blade and just ran them down. Make sure to have something under your table or you’ll ruin it.
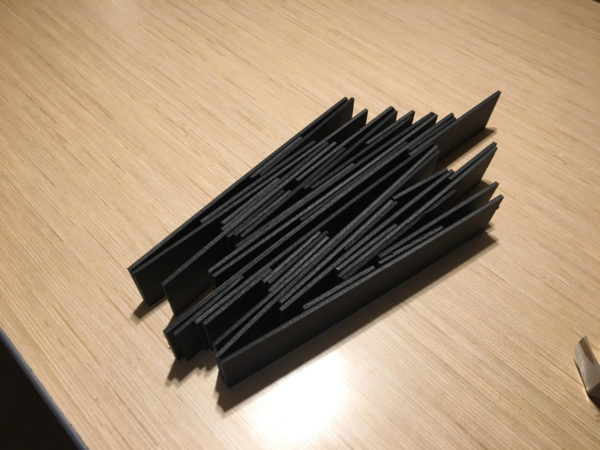
After the strips were cut, I did some counting up of my walls from the maze generator image and cut the strips down to the necessary wall sizes I’d need.

The square tool became invaluable as I could measure the first piece and cut it to size, then template it out for the rest. The flat edge of the square would hold the piece in place as I cut down 90 degree edges. I know I said I didn’t want to cut a thousand wall pieces but after running the numbers, I had almost thirty feet of wall in this maze (inside and outer edge). I know that sounds like a lot but not including the calculations and maze generation, it was only about an hour of cutting. It will go faster with a long straight edge, clamps, square, and most important- a sharp knife. Always be careful and go slow and light on the cuts so the blade doesn’t jump and bite you.


I used my maze image and laid out the map using blue tac to keep the rough draft together. After I was happy with the results, I then went over all the walls with black electrical tape to secure the joints and help hide the gaps.

The electrical tape also made the teardown easy as I taped things together with the folding in mind.
After seeing the maze laid out, I liked the effect it had but thought it was still lacking. At the beginning of the project, I was thinking of ways to dress up the walls by printing images of stone walls and library shelves but quickly realized that would blow my budge as I’d need almost a hundred pages of color prints to cover the massive amount of wall space this was creating. I figured I’d “deal with it when I got there” but that time was now. I knew I’d cheat by using the wood surface of my table as the board map but now I was stuck and I wasn’t about to spend $80 on printing just to make things pretty.

Enter the sponge. My wife had bought a whole new set of dish sponges and the texture reminded me of sponge painting on interior walls. I commandeered a sponge and promptly cut it apart.

I then glued the pieces back together onto a scrap board back. Super glue was my friend here as I didn’t have the patience to wait for another glue to set up. I tried to go for a quasi-uniform stone tile formation but with enough regularity to give me variety. Honestly, as long as you don’t make uniform rows, I don’t think you can mess this up.
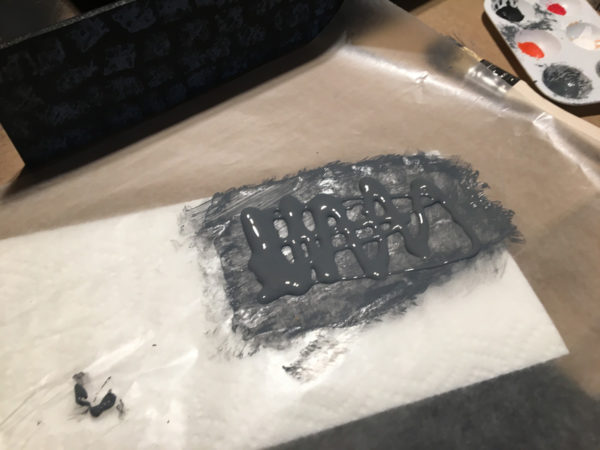
Throwing down a quick sploge of grey craft paint, I spread it around evenly (and quickly) on a sheet of wax paper, then dipped the sponge template in.
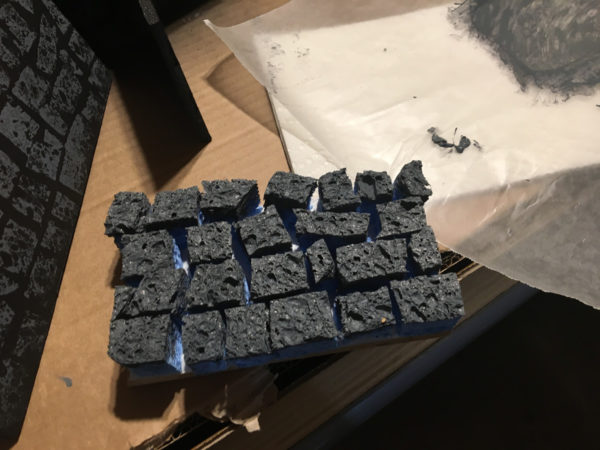
Using the cheap wide brush I spread the initial load of paint, I then dabbed off the excess from the sponge template and went to work. I got about four to five “pressing” with the sponge stamp before I’d need to load back up. A word of caution, don’t let it get to dry before going back or you won’t have much of an image left on your wall and you can’t really go back and do it again as it loses the textured-look with multiple pressings.


This uses quite a bit of paint so going with cheap craft paint is helpful. Since you have to double-side a lot of the pressings, let the first side dry by moving on around the maze. You’ll circle back eventually and hit the opposite side again later when it is dry and you can get a firm hand on the opposite side to press against. Also put something down under the maze as you’ll inevitably get paint everywhere.

Up close, it isn’t as effective but you could scale down your sponge pieces and make the wall look more in scale. From the table length though, it has a great effect and is well worth the extra time to pimp things up a notchtm. I had to work fast to not dry out the sponge and paint but 30 feet of walls painted up in about 30 minutes (double-sided). It was way cheaper and faster than printing. Can’t wait to set the whole board up and throw down some figures and dice.
Russ Spears
Excellent pimping up a notch(tm)! Those sponges worked out really well.