
Thanks to Tyler’s question on the original Digital Gains post, I’ve decided to put together a more comprehensive look at the photogrammetry steps in doing digital conversions. First up is the what the camera sees.
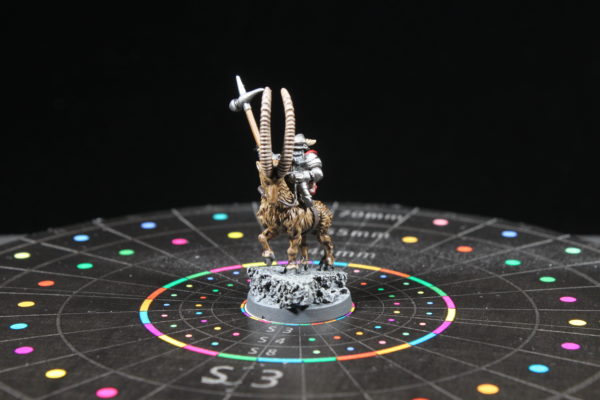
This is the through-the-lens view from my DLSR. As you can see, I don’t need to crop in too much and I’m at an angle that isn’t dead on to the mini but also not so high that the figure would lose perspective. Here are the camera stats for those into that aspect too.
You’ll see that the depth of field is pretty average. I likely should increase the ISO to 1600 and put the F-stop to at least 16 as well. Zooming in on the photo, I see a lot of pieces out of focus due to the depth of field being too shallow. Due to the dark background, the camera really wants to overexpose here so you’ll see I also crank the bias way down. This is basically one step above as low as it goes. I’m using aperture priority here just to speed things up but if you go full manual, you’ll have a lot more control.
One thing to also do is focus the mini down on a central piece of the model. Once you have it, lock it or flip to manual model and don’t touch it. Unless I’m changing angles, I’ll even leave the focus that way while swapping models on/off the turntable. Technically, nothing should be moving. If you turntable is moving, you’ll have a lot of issues so lock that thing down too. Blutac or some kind of clamping rig can help here. I’m actually only using the velvet to lock it down since that was preventing the turntable from moving anyway.
Nothing too special with the image file either. This is native from the camera and I don’t do any post-processing. Just import the 50 images into 3DF Zephyr.
Some last notes on the camera side, make sure not to get the front of the turntable in your shot. That tends to confuse the program. Come in close enough that none of the lip or front is in the field of view. Also, I don’t change angles. I lock it in on the tripod and go to work. Lastly, you can use a shutter release but I tend to make sure my shutter speed is high enough that a little jiggle won’t hurt anything.
All of this advice is really to get you to realize one thing: don’t sweat it. You can fine tune this process to a very crisp perfect execution but all that extra effort is likely wasted on this system. There are a lot of factors that go into the flaws that you’ll see and it is hard to say what items in your particular setup need to change to get better results. Fine tuning will always make a better product but I ask myself at what cost.
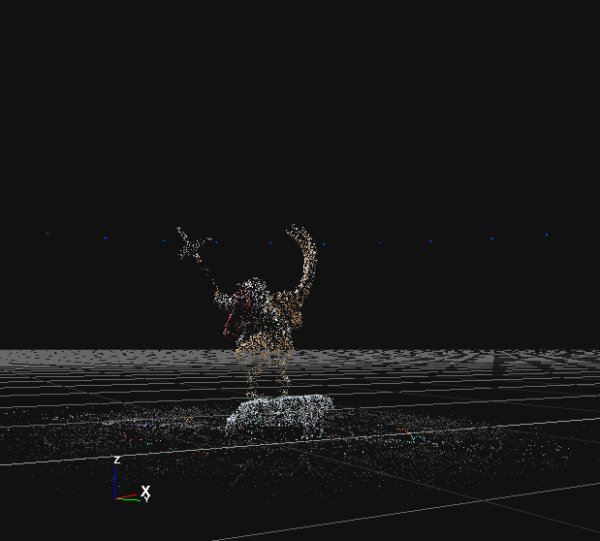
When the first step comes through, we have the initial sparse cloud. If you can’t recognize the object at this stage, you might be in trouble and should look back at your photos to make sure there wasn’t an issue. I find if I can recognize the figure here, I’m likely going to be just fine.
Next we get into the dense cloud and here things should look just fine. This is still not a 3D model yet, it is just a solidifying of the sparse clouds to make a mesh of points that will later create the polys.
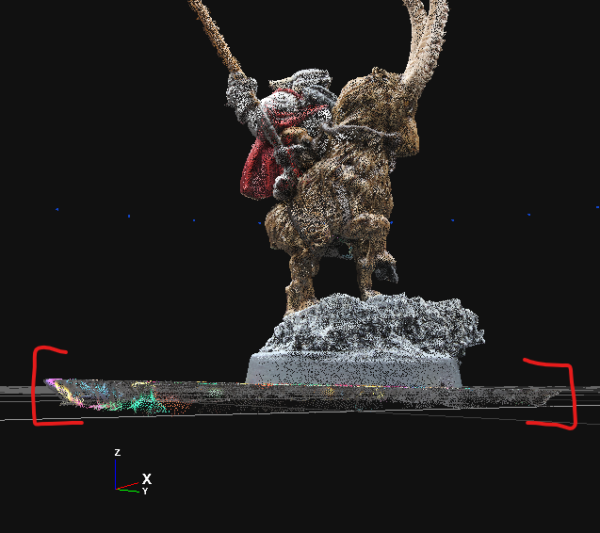
In this close up of the dense mesh, you can see what I mean. It is not a true solid yet. Also I can see the negative effect my warped turntable is having. The model itself seems fine but there is an odd thickness to the table itself. You can see that the table likely rides upward as it rotates and does so more on the left side than the right. Since it doesn’t seem to be causing any issues on the model, I’ll leave it alone.
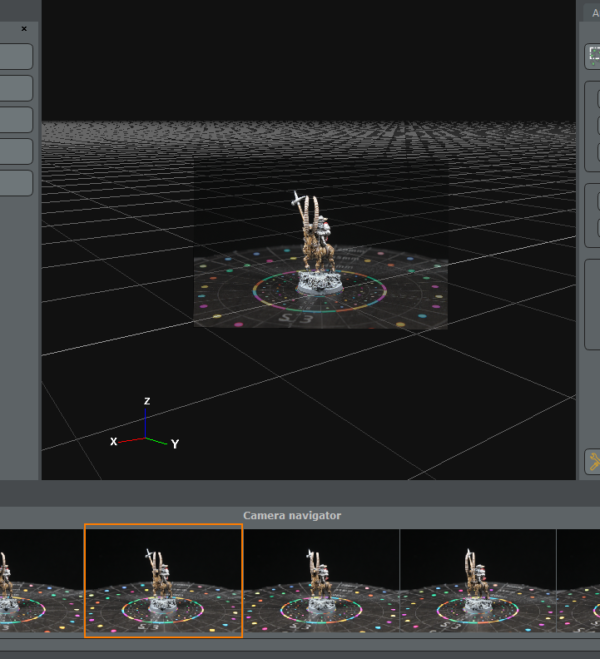
Clicking on the images, the program will also take you directly to the angled shot and how it contributes to the 3D processing. I don’t really use this but thought it was pretty cool.
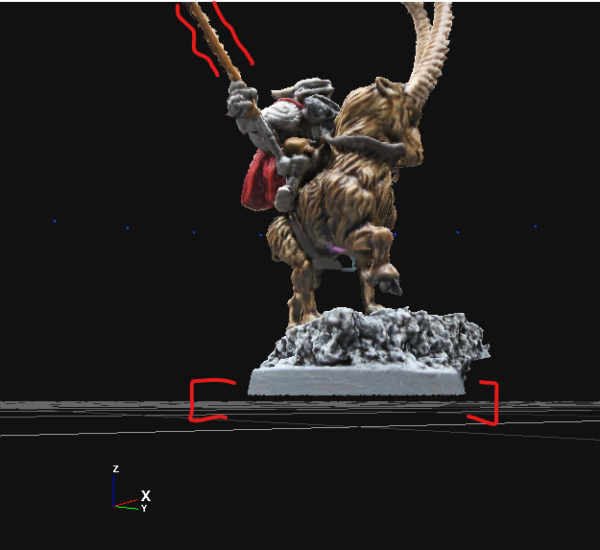
Now we have a full mesh. This is almost a full 3D model that can be taken into blender. You’ll notice I chopped off the thick table piece and there are a lot “fuzzy” pieces along the edges that normally would be smooth. We’ll work those out in the next few process steps.
The Retopology process smooths those fuzzies out. It’s not perfect but if we still don’t like it, we can fix it in Blender. This process takes averages from the original mesh to help shape and define the object.
Lastly, Decimation cuts our polygons down to make it perform better when in TTS. This tends to make things look a bit rough again but the final texture mapping really hides a lot of it.
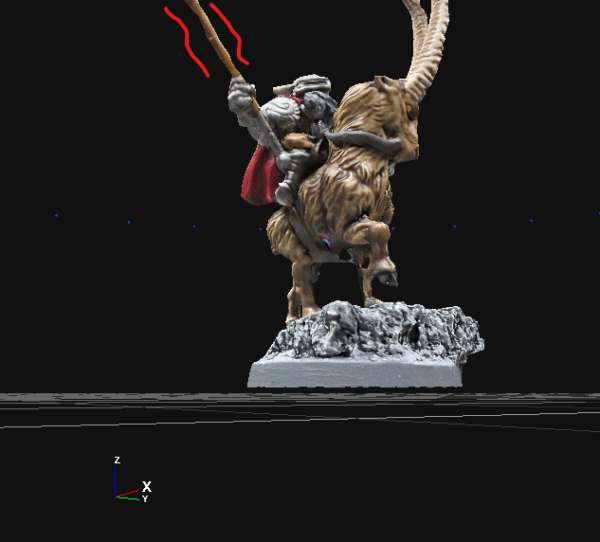
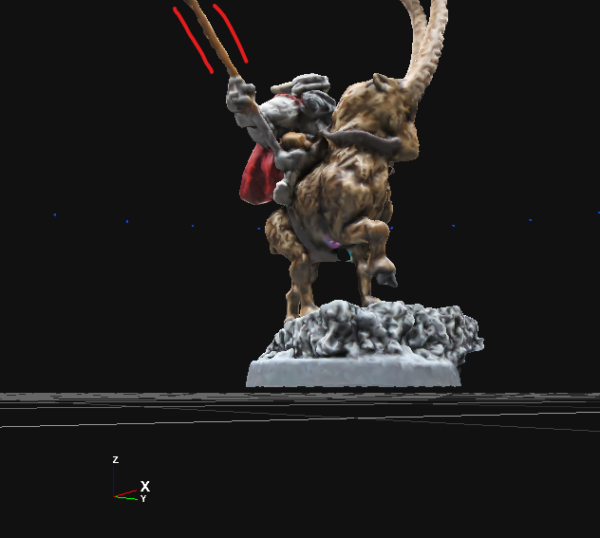
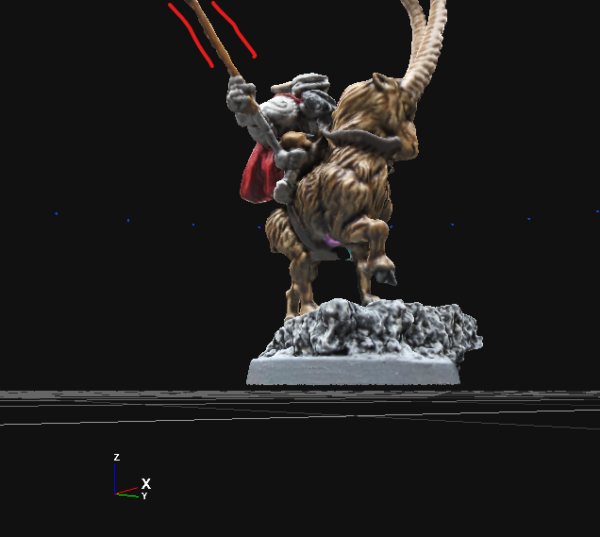
And with the texture mapping, we’ve completed the model and the photogrammetry process. This 3D object and texture wrap can be exported to go into Blender and do any final clean or adding additional effects before getting packaged up to send to Unity and importing into Tabletop Simulator.