
After some holiday and weather issues late in October, we decided to push for another game of Infinity with the weather shooting back into the 70s. Having just finished my Liu Xing “superhero pose” and the EVO Hacker bot that helps him land safely, I thought it was a perfect time to try him out.
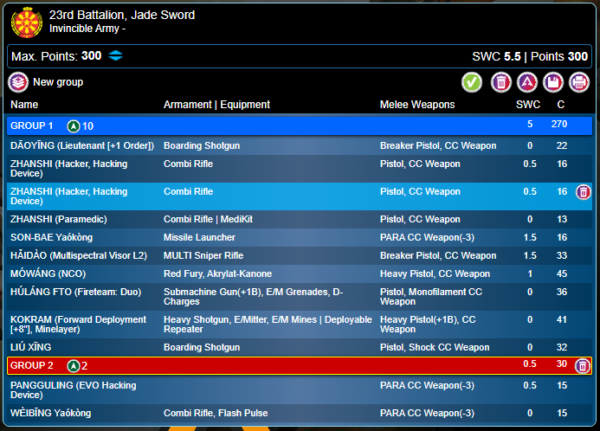
I put together my Invincible Army list, complete with cheesy names, to help give the airdropping Liu Xing a bit of help. The EVO hacker bot can also be used to give my heavy infantry a boost in blocking hacking and if my missile or sensor bot really need to hit something, I can try to boost them too. I shoved that EVO bot in a small group though so it would likely only being doing one or two things per round.
The Sensor bot stacked with him is just a potential suicide repeater for my defensive Zanshi hacker core team and maybe used to try to discover some camo shenanigans. The defensive core has a paramedic to help keep my Haido sniper up and the missile bot is there to clean up what the hacking team targets.
Playing midfield is a Mowang and Hulang duo. These two will want to get out into the midfield and start killing skirmishers or weak flank units if I want to push that deep. The Mowang will be shooting on the way in and Hulang will clean up in close combat. The Hulang is also a specialist so I can also use the team as a strong button pushing contingent. The character engineer, Krit Kokram, is there to forward deploy and set out repeaters. While he’s also an engineer, I don’t know if he’ll ever be on the same side of the field as my other units. I likely should have tried to get him a couple of helper bots to run around for him since I won’t be able to use that profile in any fireteam. Ah well. Maybe next time.
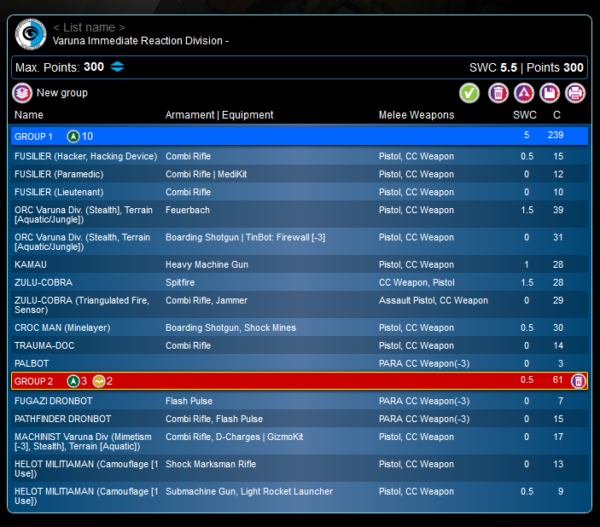
Sean brought Varuna, still tweaking and exploring his list. Orc Feuerbach core with Fusilier Hacker, Para, and Lieutenant. The Kamau HMG or the other Orc can bounce in and out of the core link team as he sees fit or needs. Otherwise, a lot of his list is the same. Helot AROs and some bots out there to annoy or be a late game specialist run. The Croc Man and Zulus are out there to disrupt and surprise shoot me in the face.
Rolling on the 20 x 20 table again, we pulled up Intercept Enemy Communication and Biotech War. This seemed like a pretty crazy mission where everyone becomes hackers with a single program: Interceptor. Basically, hack any enemy figure to gain a point. If you have more points than your opponent, gain 6 VP at the end of the game, 5 VP if you tie, 4 VP if you have less (but at least one point). Can’t hack the same guy twice (though we misread this and didn’t realize you can hack them more than once just not in the same turn). +2 VP if you hack the lieutenant and +2 VP if your opponent hacks none of your troops.
I lose the lieutenant roll and Sean elects to choose deployment. I decide not to give him both the counter deployment option and the first turn so I take the first turn and set up on the side he dictates.
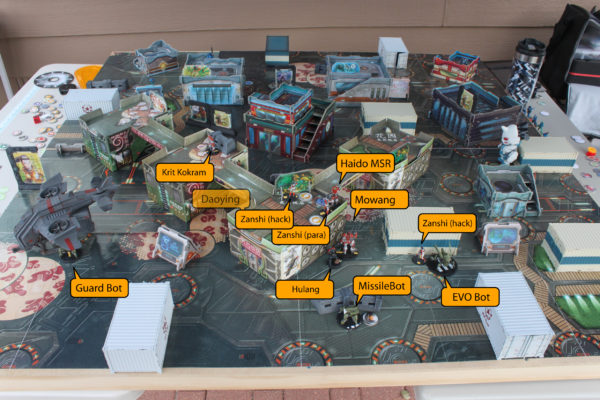
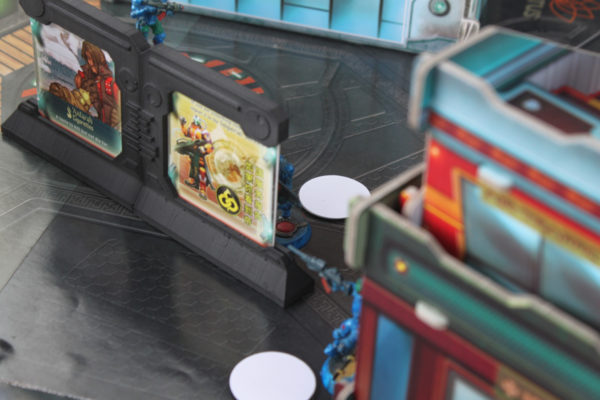
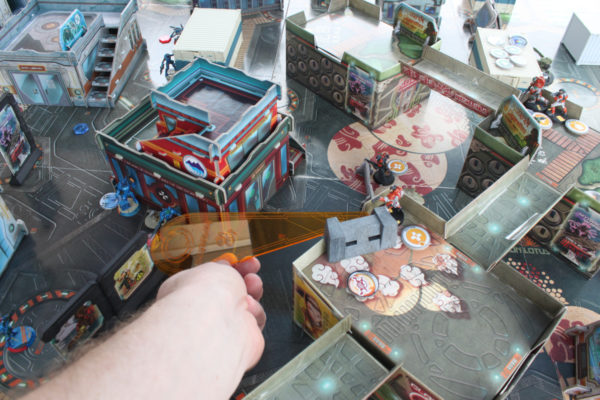
I set up my defensive core in the center with my missile bot tucked away in the back. I realize I’d get wrecked if he has anything that could come into my backfield but played the odds. With no real objectives except get close and hack, I tried to centralize everything. I threw my guard bot with sensor on the left flank but otherwise kept things center to right flank. The Mowang/Hulang duo would press into the center from the right side of the main middle building. I held back Krit and seeing most of his heavies on the left side, put him out with a deployed repeater as far up the board as the FD +8″ would allow.
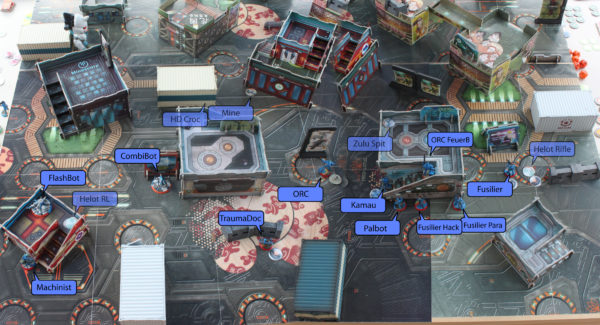
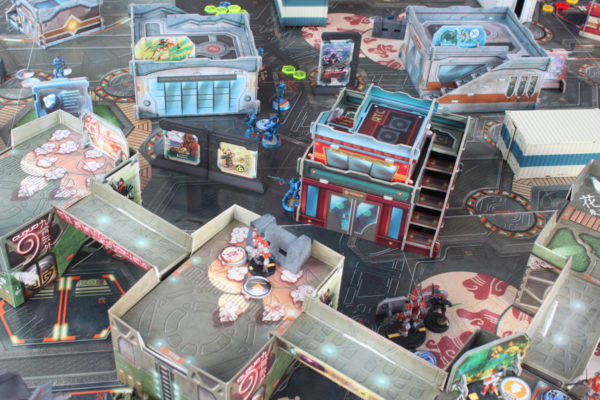
Over on the Varuna side of the board, Sean spread out his forces with a weak right flank (left side of picture). Note: the picture is a composite so ignore the half cut red building in the center. He set up his core on my left flank (right side of picture) with most of his other forces. He had a spare Fusilier for core rebuilding if he needed it and a trauma doc hiding in the center-ish.
Round 1 – Invincible Army
I start out debating whether to drop the Liu Xing on turn one and see if I can mess up the Varuna core link or if I should wait until turn 2 or 3. I had a really nice opportunity to land right between the para and hacker Fusiliers without anyone else seeing me. Everyone around could dodge and take aim after I touch down but no one would be able to reactively mess with me. Taking at least one of them down would start to mess up the link and then I could boarding shotgun the survivor or, if both dropped, mess with the remaining Fusilier and likely get the template to hit the camo unit. I would likely have a bunch of other things firing and wouldn’t survive but taking out the 3 Fusiliers would really cripple his fire team.
Instead, I chicken out and decide to save him for a turn 2 surprise. The Mowang-Hulang duo makes their way out to the center field and instead pulls a redfury shot on the link’s team leader. I totally forget to ask even what I’m shooting at so finding it to be a Kamau HMG is not great. What’s worse is I’m 24.2 inches away so my shots are trying to hit on 4s. With the link, the Kamau gets a shot through but luckily, the Mowang tanks it.
Things start to get a bit messed up at this point as the wind starts to kick in and gusting a bit while we’re only on the 4th order of my first turn. To add even more fun, a random wasp starts harrassing us during the game and really never stops. Aren’t these guys supposed to be dead by now? We’ve had several hard freezes so I’m pretty surprised. Even with the annoyance of the wasp doing multiple buzz-bys, the wind is actually the more concerning factor as the gusts are sometimes moving the bigger terrain pieces. I’d heard there might be wind so I blutac’d down the the light stuff but I didn’t get everything down and if it was strong enough to move the buildings, it could take a miniature down too.
I’m not a fast player and Sean’s concern about our minis has us thinking we may have to call this game. The wind settles but the distractions take their toll and after some hemming and hawing, I send out the Mowang-Hulang team deeper into the center (avoiding the Kamau HMG) to investigate the camo trooper. Sean played me a fool! It was a mine and the Hulang takes it in the face. Luckily, he tanks it and I realize their is an HD guy out and about some where. This is more evident as I do some really stupid wasted orders moving back and forth trying to find my attack angles and Sean starts asking me to pause for ARO when there is obviously nothing around. Something is coming…
I realize, my stupidity has overextended my troopers reach and I’d be easy prey to the Interceptor hacks if I stay out in suppressive fire lanes since it’d be easy to walk to the other side of the building and just start trying to hack me. I decide to hunker down and wait to see how Sean approaches things. I end the turn with the EVO using Fairy Dust to beef up my Heavy Infantry hacking defense.
Round 1 – Varuna
Knowing we don’t have a lot of time and won’t finish this game, Sean starts by trying to at least get some of the mission objectives going. My Mowang-Hulang defense team looks like the best option.
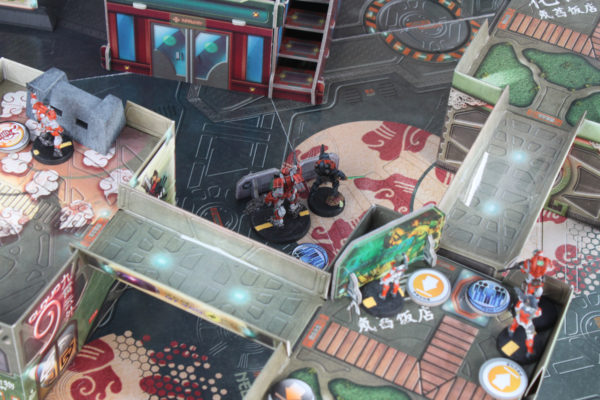
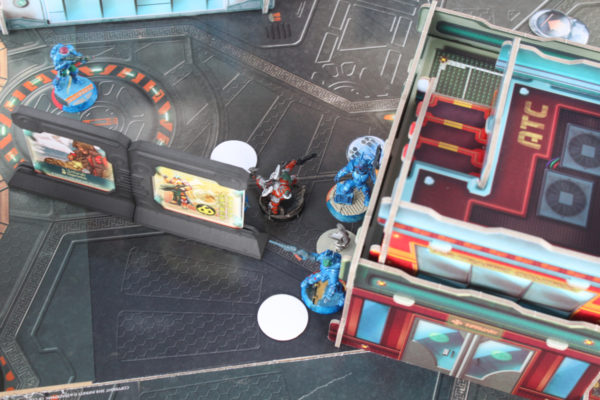
The Core ORC link moves out mostly unopposed. They make for the center with really only Krit Kokram to harass them.
Lucky for me, Krit dodges and goes prone behind cover. This allows the rest of the fire team to come out and hunker down behind a building. There are some really hard zones ahead with my Haido Sniper that the Varuna team is going to try to push into.
Instead of going on a full out assault, the team pushes the BSG ORC forward to get into position to start intercepting the Mowang and Hulang communications. He has stealth and I don’t have anything with line of sight so I get to sit and wait. He is, unfortunately, in range of Krit’s deployed repeater so when he does try to hack, he gets a double dose of Oblivion from my two Zanshi. He does have a tinbot to soften the attack but is also try to hack two of my heavy infantry that are also under hacking protection.
The opposed rolls from the ORC don’t make it against the Mowang and Hulang and my uncontested hackers score an oblivion on him. That breaks the team and isolates him. Sean brings over an additional Fusilier and reforms the fire team to instead start shooting. He sends his Kamau across a narrow gap between the advert signs and the building to burst several shots at the Haidao sniper and the Mowang. The Hulang is too far to the left to get a shot.
Sean does this a couple of times as the Haido hits are getting blocked by good armor saves and the Mowang is dodging well. Eventually, through, repeated arcs, he is able to remove the Mowang and put a wound on the Haidao and the Hulang. This last wound hurts because the Kamau had to get into repeater range to get the shot off. The Hackers Isolate him as well through oblivion. This breaks the fireteam again. Sean reforms but this time in a more defensive position.
Earlier, he had is ARO team beaten up from his group 2 troopers as they tried to take on some bad range match ups. He used his remaining turn to get his machinist into to position to help them out. The wind is really coming in annoying gusts at this point. The wasp was even annoyed enough to get the hell out. I really want to at least see my Airborne drop so we decide to run my second round and see if we can hold on to the game, hoping the wind will calm down.
Round 2 – Invincible Army
Looking at the board state, I don’t really have a meaningful place to drop. Sean did cluster his two isolated troopers in close to the only remaining Heavy so dropping in there would be my best chance to explode. This being the first opportunity to use this skill, I feel like I have to regardless of whether it makes real strategic sense.
I don’t let my temptation get the better of me yet and still focus on the objectives. I have my hackers both intercept signals from the isolated Kamau and ORC. Thematically, this likely shouldn’t work as we’re trying to get their signals and isolated basically means they can’t send out signals. I chalk it up to using the 20 x 20 mission set and it isn’t 100% compatible with N4 yet. In any case, it works and though they try to reset on 4s and 3s, they fail and I get two objective points.
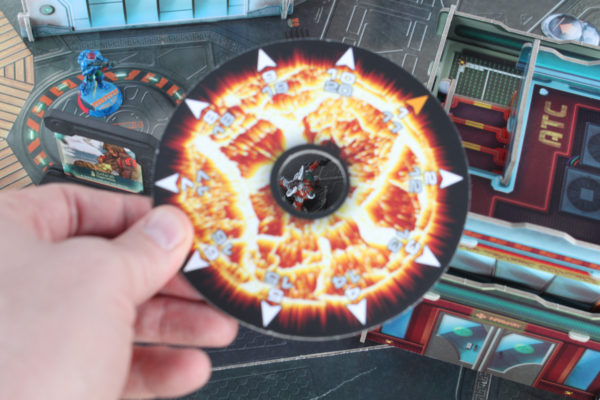
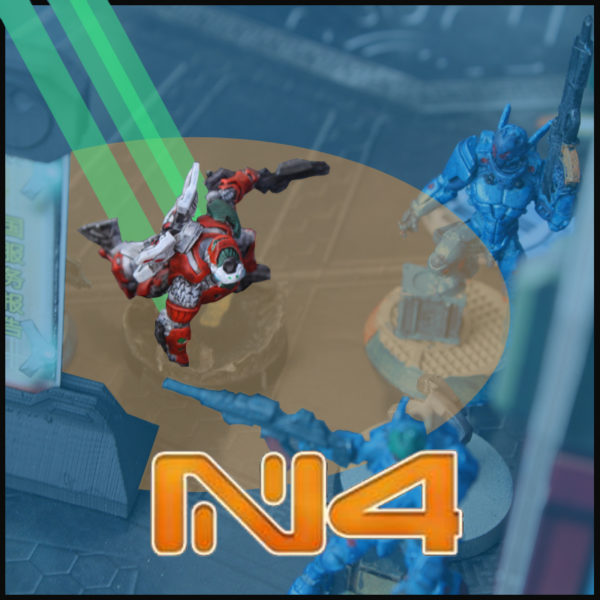
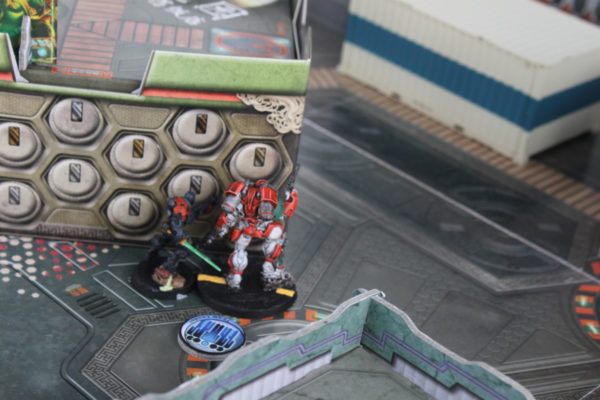
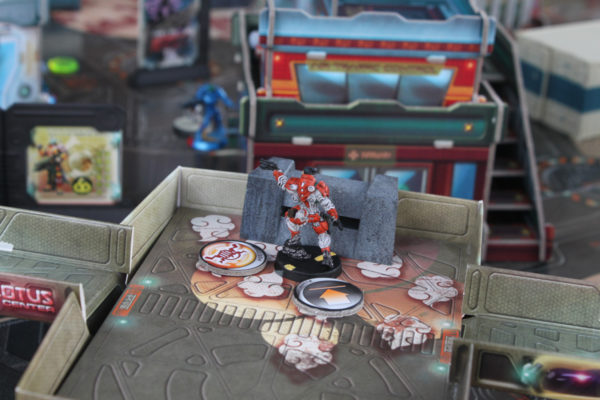
With real work done, it is time for some fun. I have the EVO hacker set up the jump using the Controlled Jump program. I realize this is Liu Xing’s first jump and my use of this in the future depends on this going well so EVO gives him a nice confidence boost.

Damn, if he didn’t need it. I need 14s normally and roll a 15 so the +3 boost from Controlled Jump got me there.
Super hero landing success! What transpires next will live on in our collective history: the explosion kills them all. Like all of them, even those way out of range. It’s like that moment in Kung Fu panda where all those enemies witnessing the awesomeness go blind.
Wait. Nope. That was the movie in my head. Instead… Sean chooses to reset the isolated guys and feuerbach Liu Xing in the face. I think technically the Fusilier off the side could have decided to shoot as well as the Zulu spitfire above but it ends up not mattering.
Sean tanks all the explosion hits. This wasn’t really out of the norm as it is just Damage 12 and these guys all have armor but it was a little disappointing to not to get any of them through. Next, the isolated figures both pass their reset rolls (needing sub 4s and 3s). Then, the feuerbach ORC hit+crits Liu Xing in the face at point blank range. I fail enough saves (out of seven rolls) to not matter and Liu Xing not only did nothing but got the two main threats out of isolation and allowed the other ORC to fail a guts roll and get farther out of range. Pretty Epic.
I hack the Kamau and I’m able to put him in the targeted state to rain down guided missiles on him. Of course I should have done this first but I wasn’t going to have this nice cluster and once I landed, I was going to sacrifice the Liu Xing anyway to intercept more troopers and expand my lead. Prudence would have been to land out of sight behind a building that I could repeated hack from and pick off enough of his troops that my lead would be insurmountable. Alas, not to be.
Now targeted, I throw down a guided missile and obliterate the Kamau and do a damage on the ORC. I follow up with Krit and his Heavy Shotgun, taking down the ORC while the ORC trades shots with his Shotgun. We both go down.
The wind really starts to force us to wrap it up so I send the Hulang out and back far enough to hack the last ORC and it takes 3 tries but he eventually gets it and I pull my troops back into a defensive position, making it hard for Varuna to try and push in and intercept my troops. It is irrelevant because we don’t want minis to go flying around so we quickly pack it in.
I think the game still had some opportunities for Sean to win but he felt pretty hard pressed to get it done. He has no repeaters to push through except his remaining bot and my forces (if we were actually going to play the other rounds) could have been set up to make that approach very painful.
Yu Jing Mother Nature Wins!
It would have been nice to see it fully play out. Even with Sean not liking his prospects, when he pushes in against all odds, it makes for a very tight and nerve-wracking experience.
I don’t have a lot of experience with Airborne drop rules but this went pretty typical for me. My N3 games that used it a couple of times scattered my trooper off the board for usually the ultimate in lost points. I’d argue this game’s result was even worse as it had the same effect but also improved Sean’s board state considerably. That was obviously my own fault for landing in amongst a lot of his guys and trying to hit heavy armor troops. The Airborne drop had a lot of better location drops but I wanted to “fall” for the explosion drop trap. I’ve read before that you rarely will use it for that as it carries too much risk.
I do like the N4 rules though as it seemed I’d never take the drop option and always choose to just walk in from any side. Mitigating the risk of a completely random drop location or worse, an off-the-map result where you lose the trooper completely is a good change. I think there is enough swing in d20 games that you don’t need more for figures that, due to a fickle d20 result, you just completely lose.
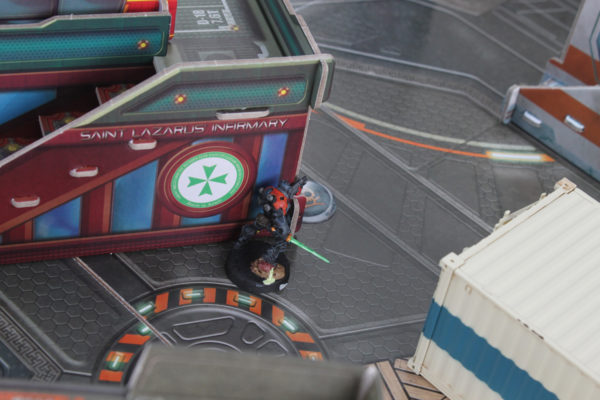
While the mission favored my team and board state through most of the game, I have to give Sean props for winning the “Gotcha!” game. His minelayer HD Croc totally fooled me and had my Hulang not tanked that hit, he would have been smoke due to the deployed shock mines. My Airborne Drop would have been a nice Gotcha! and probably was when I announced it but the results were so comically bad that I get zero points for that.
Pan-O Wins!