
Some time before the end of the year rush, I was able to sit down with a great painter in our Infinity group who was showing off a quick technique that he’s used with great success- dry brushing. Now I’ve been dry brushing for some time but seeing his results and technique, I see there are some critical details I’ve been missing. As much for my own benefit of documenting the technique in detail, I have it now before you.
Trox, our Haqqislam and Tohaa Infinity player/ event coordinator helped lead me to a new level in something as simple as dry brushing. At its most basic, dry brushing is loading paint into the brush, clearing off the excess and fanning the model to only highlight the highest/sharpest points. I thought about maybe using this to cheat and “edge highlight” something like a weapon quickly. I tried it out and failed miserably. Admiring Trox’s well painted Haqq team, he floored me by explaining that all his weapons are dry brushed. I had to know what I was doing wrong.
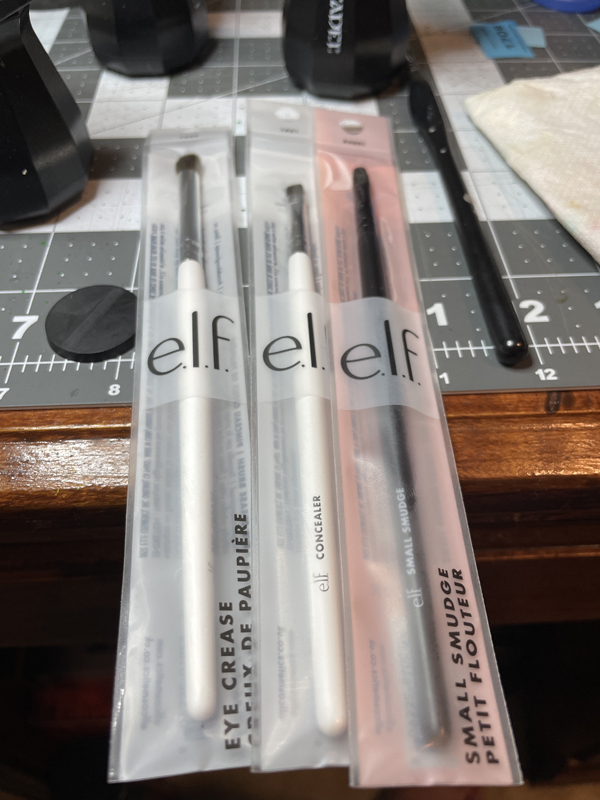
First off, I needed the right tools. I was using crap brushes that were worn beyond their normal painting shelf-life, thinking they could be dry brush tools. I was wrong. The real tool is makeup brushes. I grabbed several e.l.f. brand smudge and crease brushes for about $1 apiece.

Armed with these expert tools, I was able to put them to good use. For my guns, I went with black primer but for better results, it is good to start a little up from pure black. You can then ink or add a wash to complete the shadows in the deep recesses while keeping the base up from pure black. Then take a midtone grey and high tone accent. For me, I’m using Dawnstone from Citadel and Ivory from Model Color. You likely don’t want to go full white as rule but maybe as a final spot highlight if you want to catch something specifically on the model.
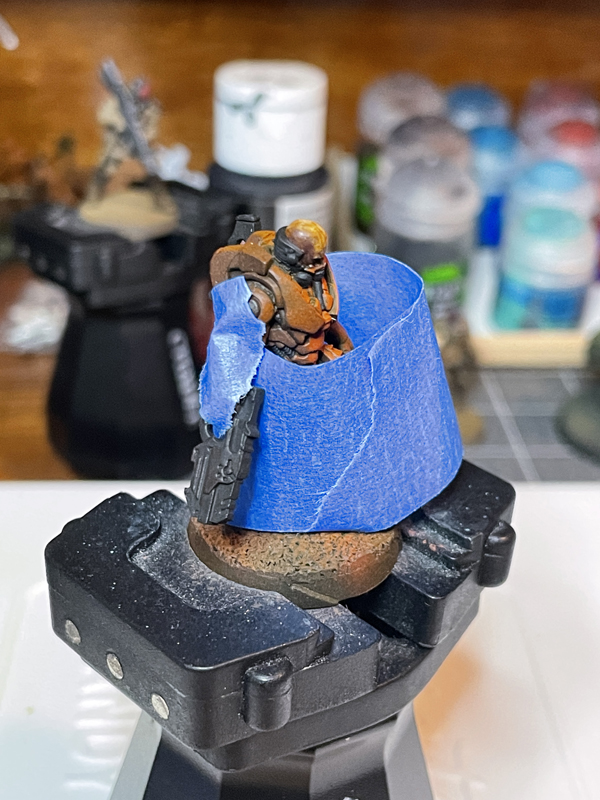
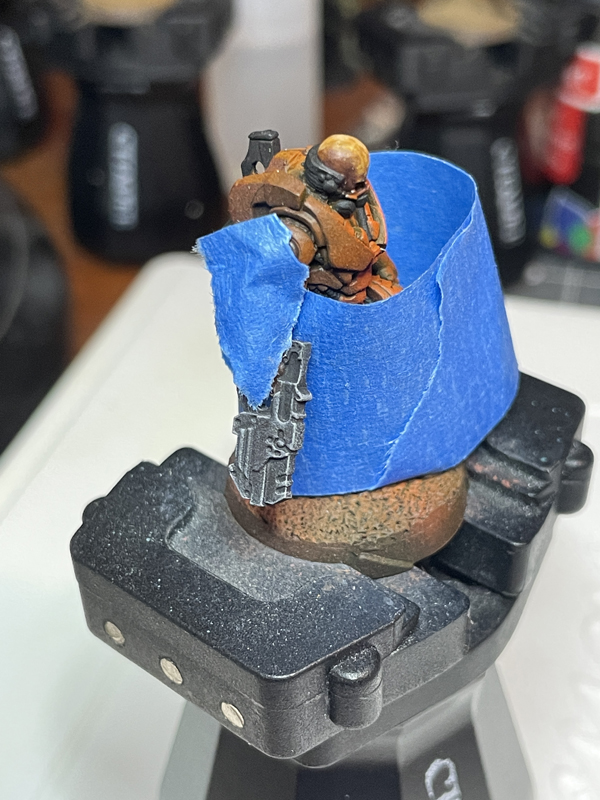
I’ve already done a bunch of airbrushing highlighting on my model and want to preserve that work so I masked it loosely with painter’s tape. If you want to be more careful, you can seal the model then fully mask the part you want to be untouched by the dry brushing. It is not a precise technique so if you don’t mask, be prepared for it to get on places beyond the main focus of the technique.
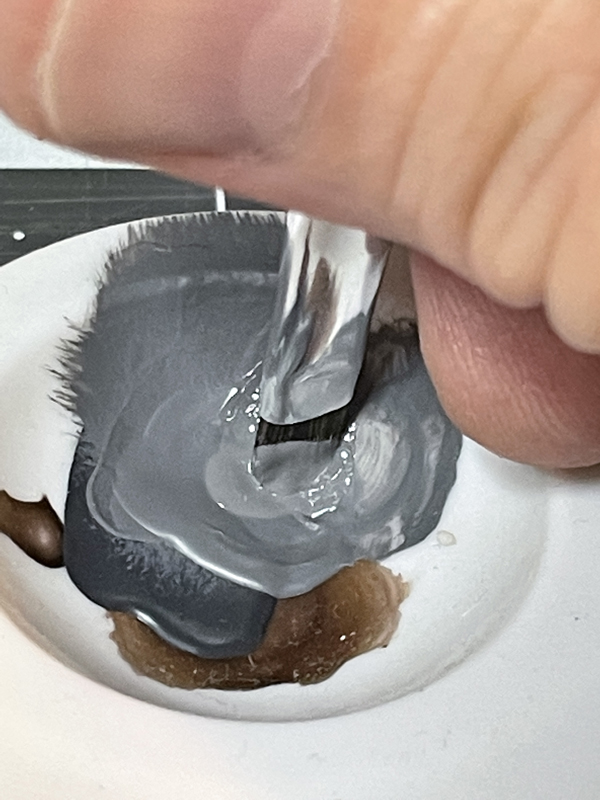
Time to get paintin’! Get a good bit on your palette- not a wet palette as you want to maintain a certain amount of dryness in your brush. For that matter, do not pre-rinse your brush either. With the paint ready, smush that brush in there. You want that undiluted paint to get deep into those bristles so coat heavily and make sure you are getting the center bristles as well.
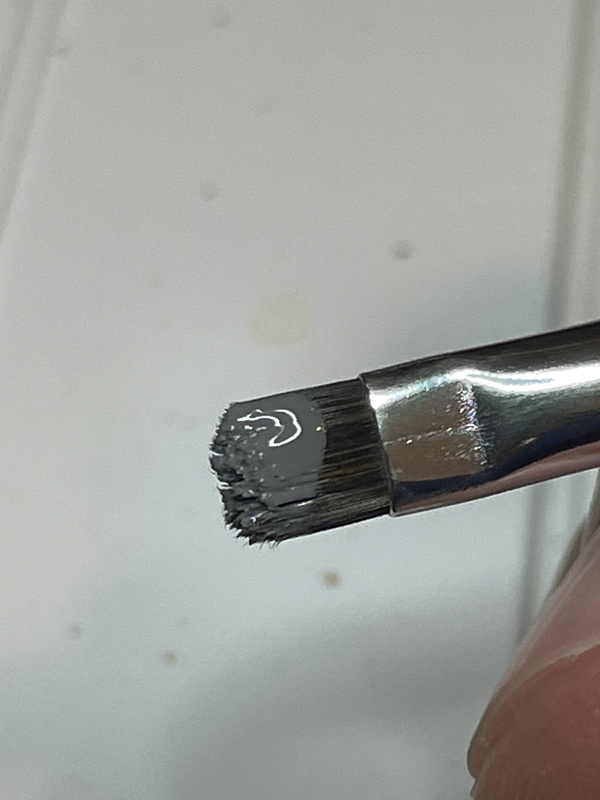
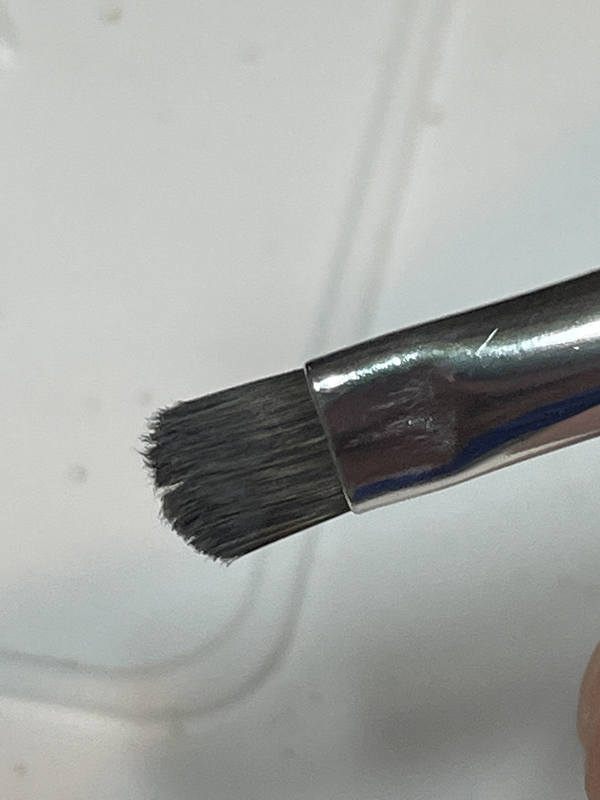
The paint should be relatively thick in the bristles. You don’t need to go all the way to the ferule of the brush, just make sure the bottom half is good and coated.
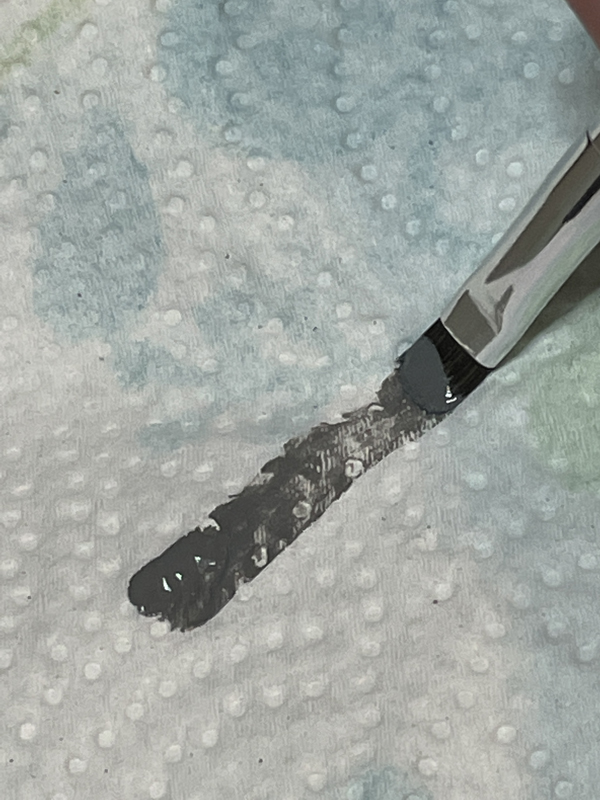
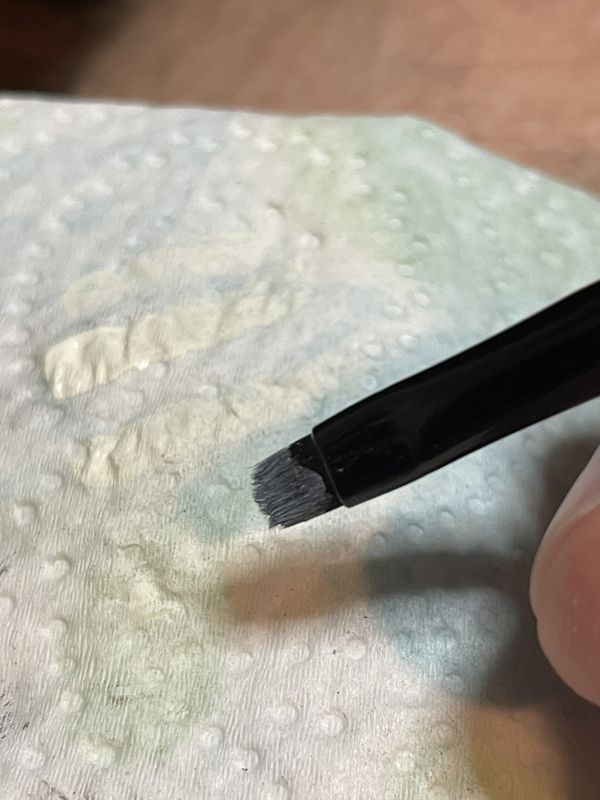
Now that you have it loaded with paint, wipe it off. Yep, waste that paint. The key here is going at a very shallow angle to the paper towel. The goal is to wipe out the excessive paint on the outer bristles, not the inner ones.
You’ll see the outer bristles were cleaned off pretty well but you can see the paint is still in the middle and center. With this excess wiped off, you can now dry brush the towel to get the paint down to a thinness that will give you the highlighting you are looking for. In this, you are doing light brushing back and forth looking to see when the brush isn’t leaving paint on the towel anymore (or only faint traces).
Now you are ready to test. Note, we still have not gone anywhere near the model yet. The technique is one of trace amounts of paint building up the effect over time so be prepared to waste paint and take your time.
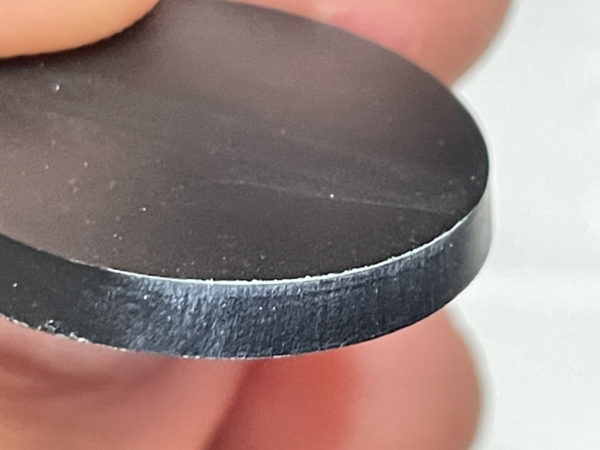
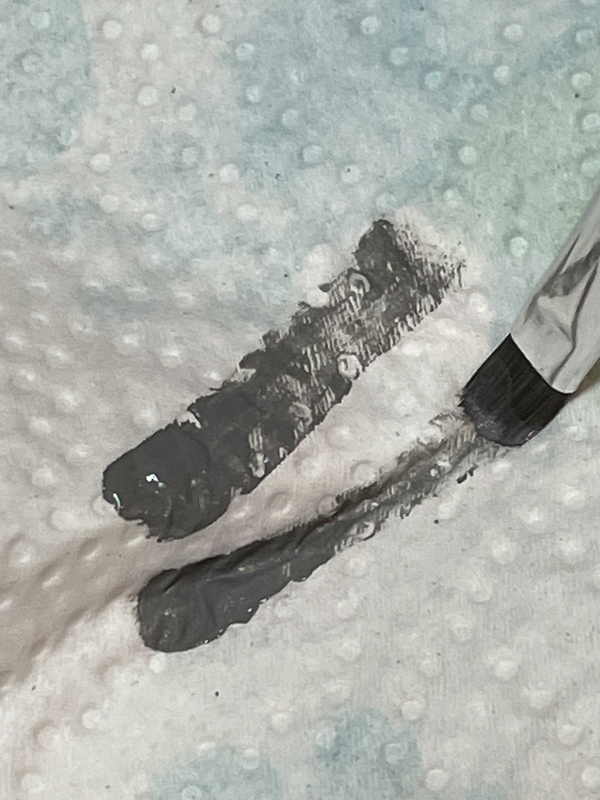
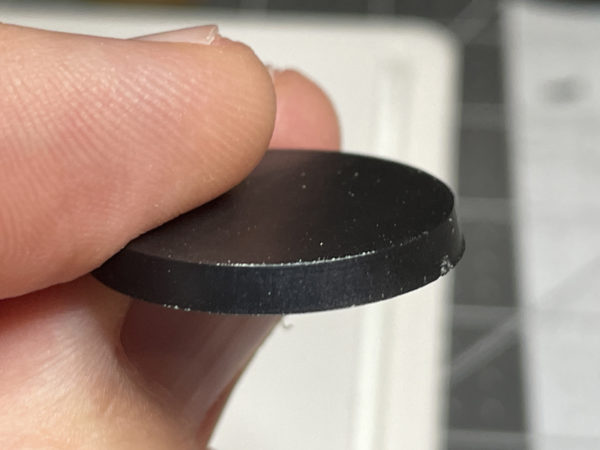
Now test on a hard edge piece to see the results. An Infinity base is perfect for this. As you can see, the brush is still too heavy with paint. If it is leaving marks or paint on the flat bits, it isn’t ready and needs some additional strokes against the towel or your hand.
Now we are getting somewhere. There is still some remnants on the flats but you can see the edge of that base clearly highlighted. Now it is finally time to get to the model.

When applying the paint to the model, we now want to brush the model, stroking it in one direction with the flat of the brush perpendicular to the model and using its width to go across. When applying your stroke, it should start high where your light is coming from and go down or away from the light source. When you complete the down motion, you leave the model and come back and away from the model so you are only apply paint from the top down. Resist the urge to just swipe back up and leave paint on the bottom side as well unless you are going for a specific effect. You want this to simulate an edge highlight which is theoretically being lit from the main light source lighting the model. This has the added effect of adding more paint to the higher points of the model and fading as they go down.
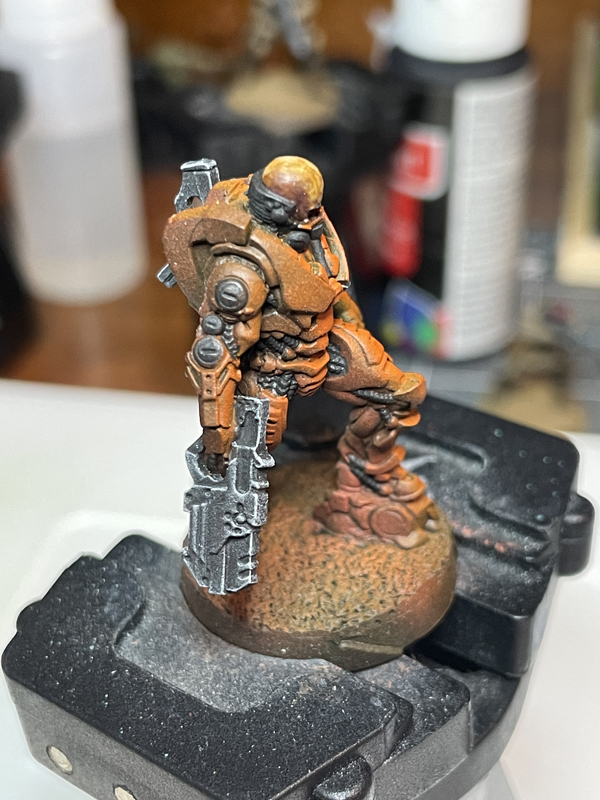
Depending on the model or area, you may need to repeat this whole process a couple of times. For this weapon, it took two rounds to get both sides of weapon. It still left a bit of paint on the flats but that could be cleared up with a wash, helping blend the flats back. Since I started with a flat primer black, I was okay with the lightening up of the weapon overall.
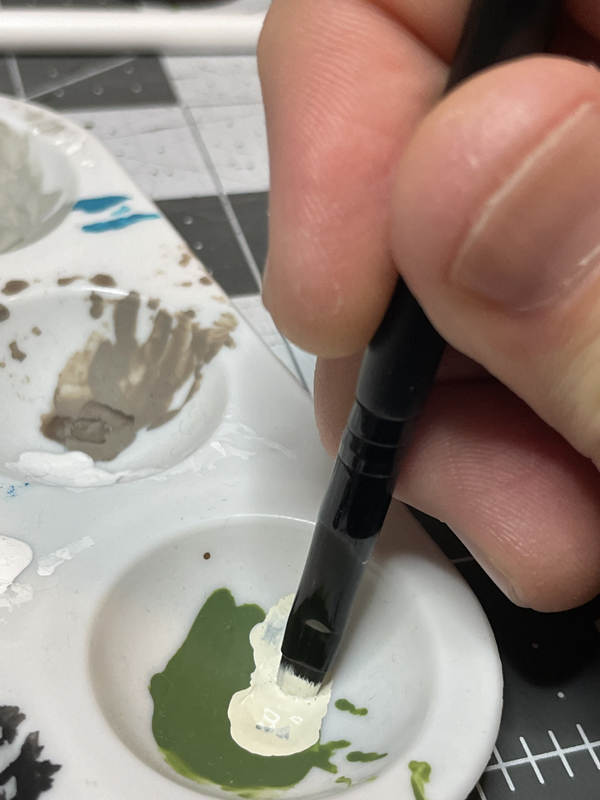
With the Dawnstone down, I move to the highest highlight, Ivory. Smush in the smaller brush and smear off the excess.
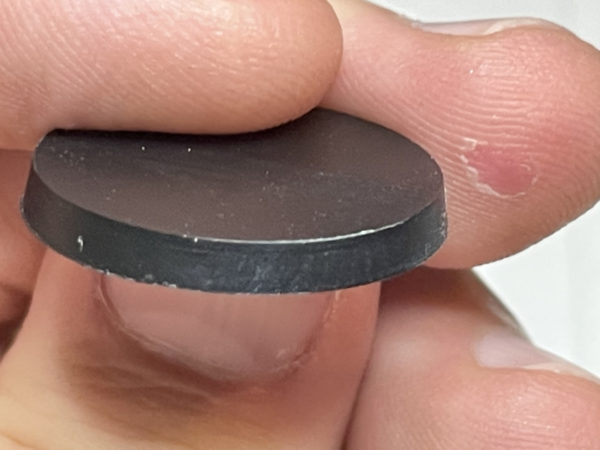
Then brush the towel or your hand and test until you get clean highlights. It’ll be more important to get the cleanest highlights at this stage because the brighter highlight will leave noticeably bright streaks on all your previous work, ruining the effect. While testing, I just wipe off the base to clean it and prep it for the next test. Since the bases aren’t primed, the test just rubs off with a swipe or two from my thumb.
Again, stroke from top to bottom or from light to away from the light sources. With the final highlight, you do not need much to get the effect. I believe this was two strokes total and a little will go a long way. This image is overexposed to keep it consistent with the earlier shots.
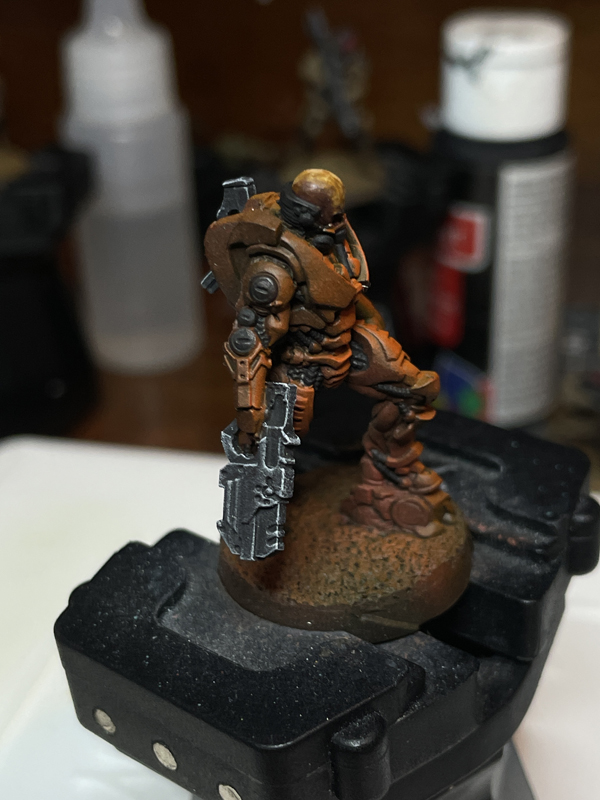
Underexposing the shot shows how it reads in real life, mimicking more of what I’m seeing on the game table.

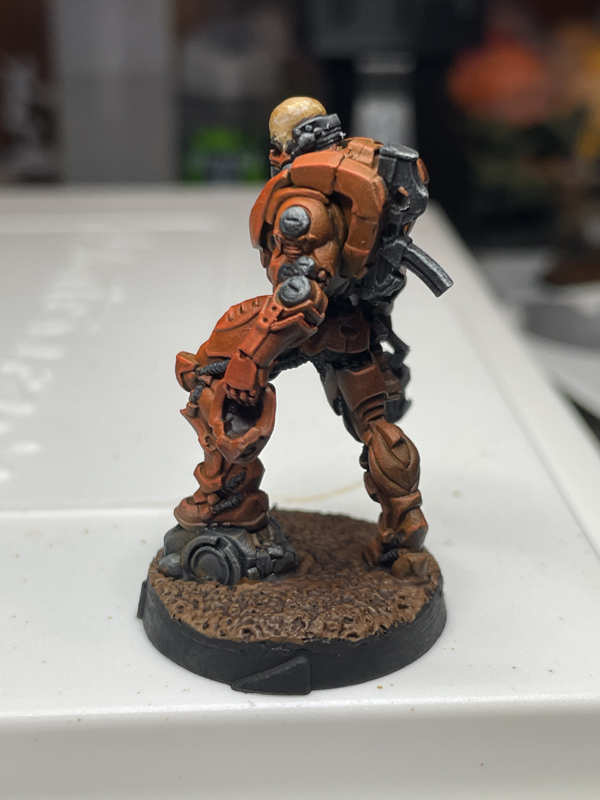
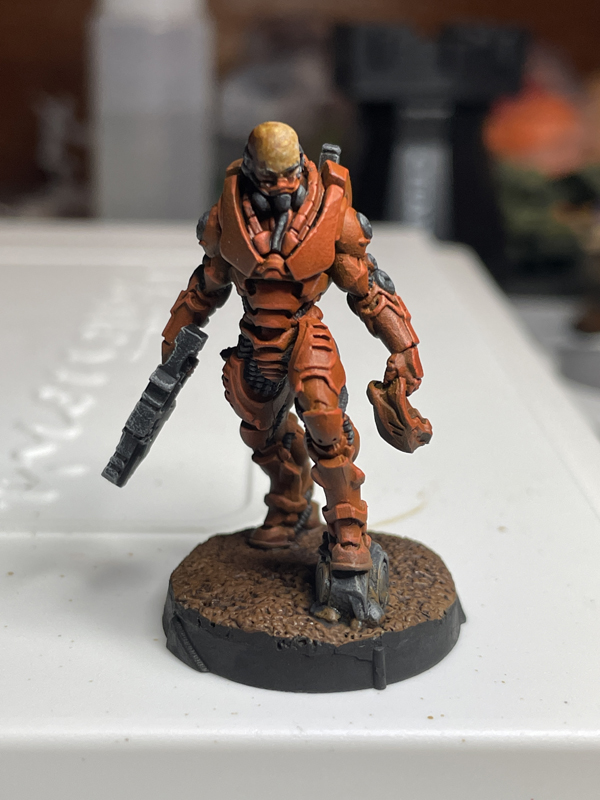
And here is the model with the armor and details edge highlighted up to my finished level. While the technique seems like a lot of work, it really is quick and easy. Comparing how precise it highlights the weapon edges compared to my actual edge highlighting and the fact that it is easy to process and fairly mindless makes this a technique worthy of adding to your standard operations.
Russ Spears
I’ve always been impressed by your overall painting, but that’s now gone up a notch. Wiping off the excess from the outer bristles – how did I not know that? Plus, thanks to you, I found myself visiting the make up aisle at Wal Mart today.
Have a good new year, Christian!
Christian
Thanks Russ! It was totally a revelation to me too. Happy belated New Year!