
This week is a little bit of a change up. I didn’t have time to run The Pit this week so I’ll have to do a double dose for next week. I was, however, able to finish up a little side project with an extra truck miniature I picked up with the Collector’s Edition.

I already have two of these painted up so I wanted to do something a little different with a third open and, as I said just Monday, I’m really in to lighting things up. But first I need to see what is under the hood.

Well there’s yer problem! Ain’t got nothin’ insider. We’ll have to fix that.

But first let’s back up. Removing the hood is pretty easy. Just follow the mold lines and go slow with a combination of Xacto Knife and Razor Saw. Take your time and wear gloves if you’re prone to accidental gouging. After the hood is off, sand it down a little to smooth out the rough edges.
As you can see from the open hood shot, there is a lot of plastic to work through. After I had scored a deep enough line with the knife, I switched to a very slow motion with the razor saw (so I didn’t risk jumping the line and scratching the model- not a big deal though as you can hide the scratches or enhance them when you paint)

After that, it’s priming and painting all over again. I painted the inside black as well in case it helped or if anything ends up showing after adding the lights.

What’s nice is the pimping is pretty self contained and you can easily put the light in or remove it on the fly as the hood will stay on pretty well.
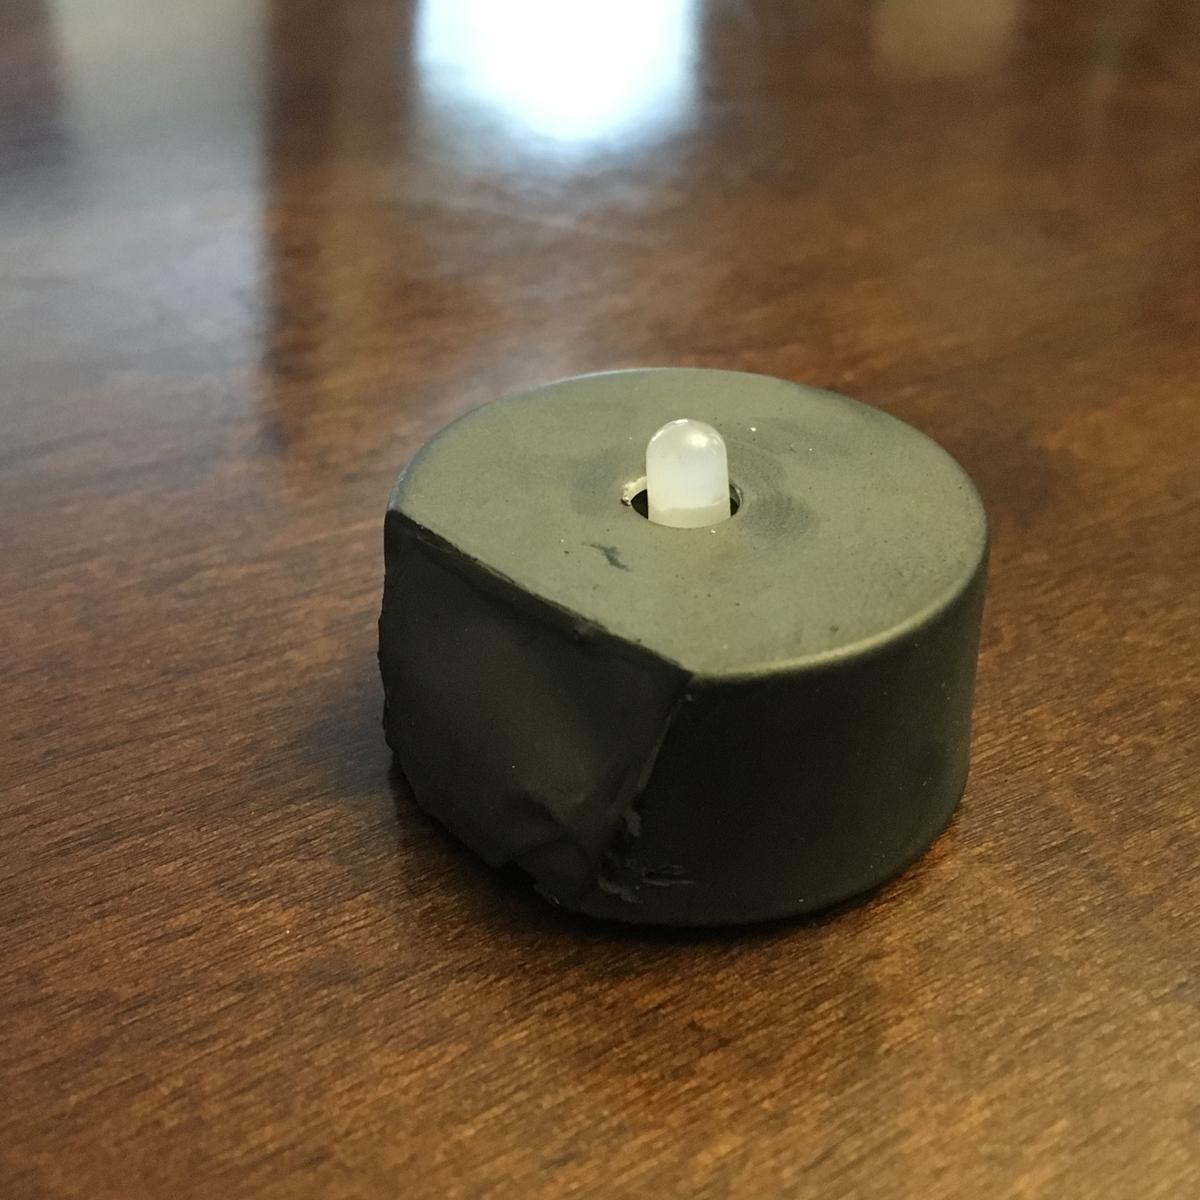
For the lights, it’s just a simple LED tea light again, cut down a little on the sides to fit under the body then primed black so it isn’t as noticeable when sitting under the vehicle.
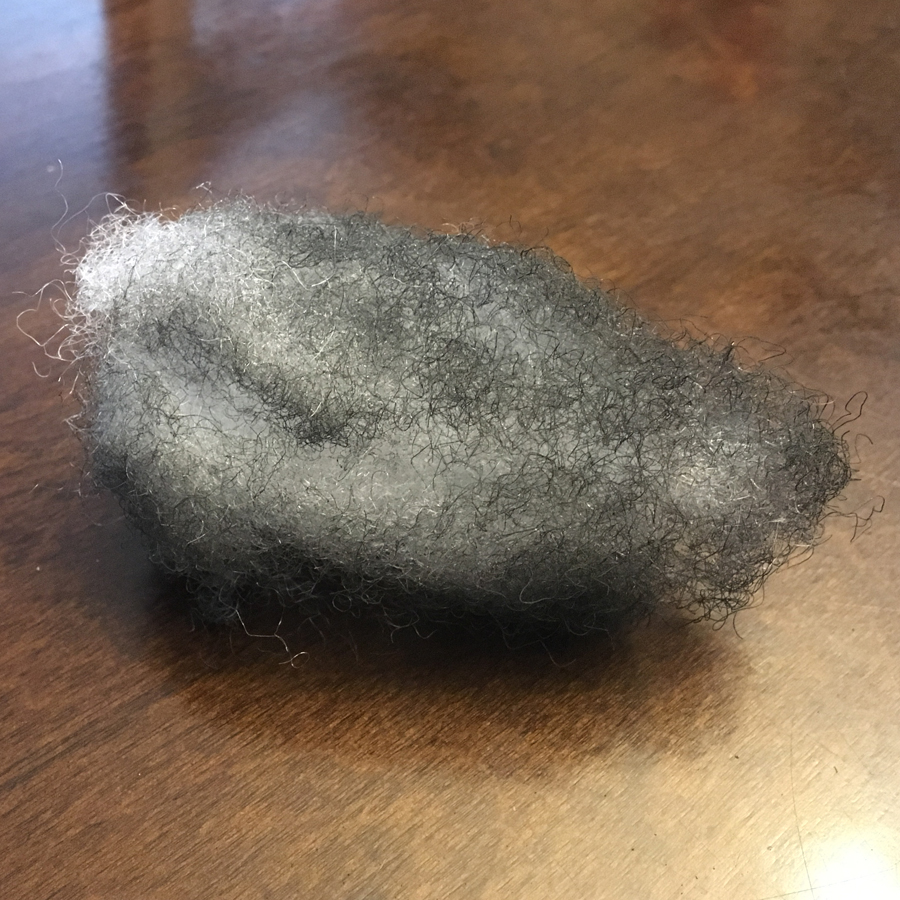
The smoke is just standard cotton filler with a dusting of black primer as well. I tend to go heavy on the top and lighter as I go lower to get the best effect.
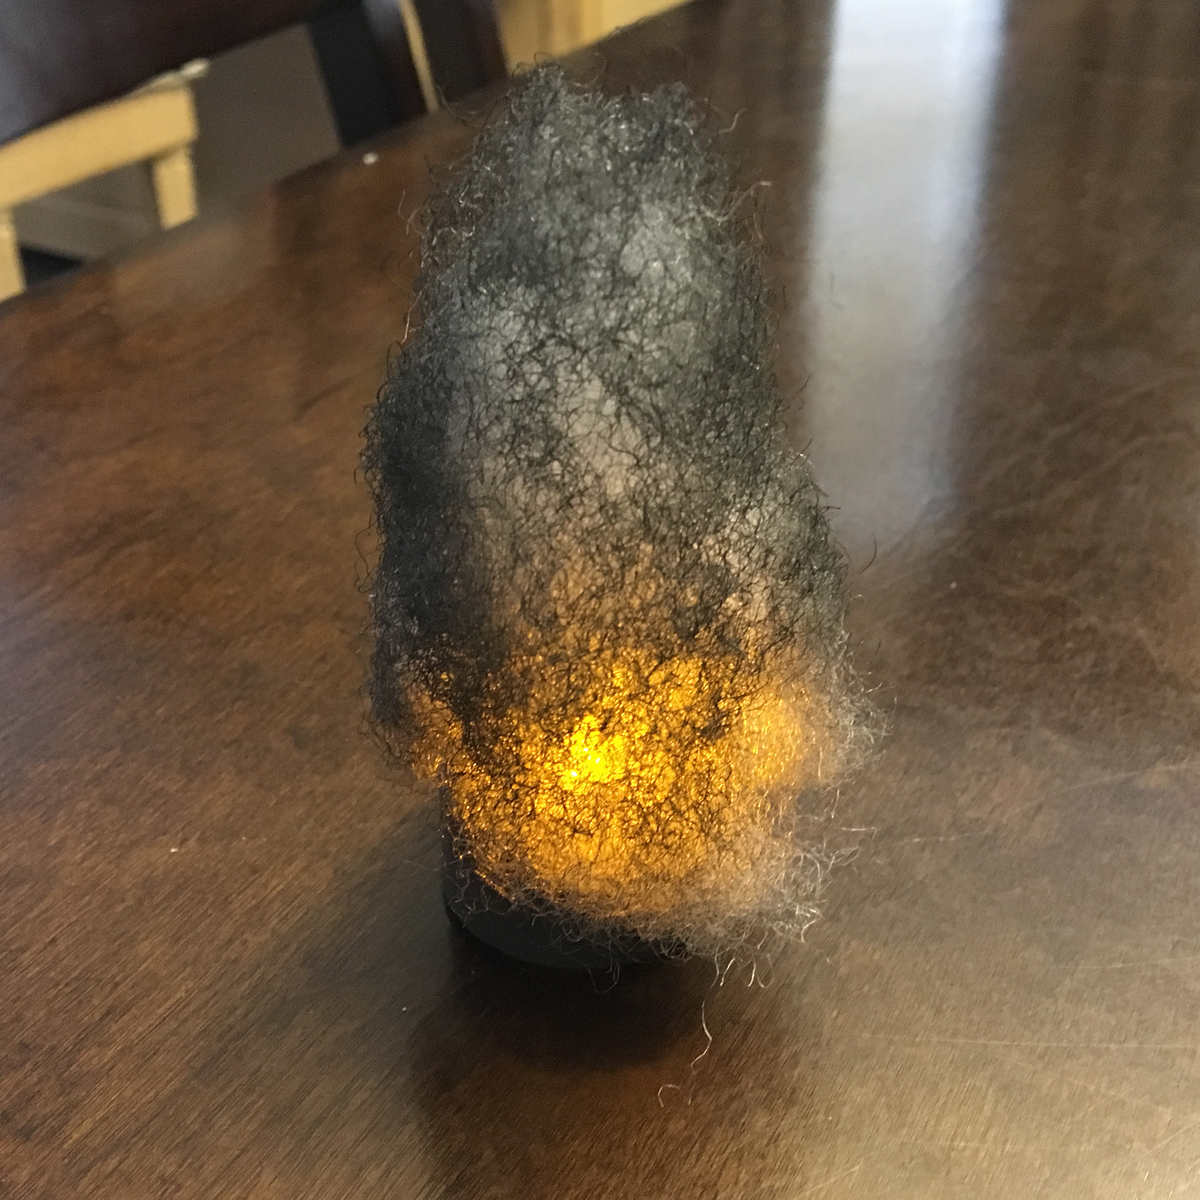
With everything lit up, this classic effect works well and is really easy to achieve.
I used clear packing tape to tape the inside of the hood to the inside of the frame in the open position. Next, shove the cotton inside and put the light in the bottom and that’s it.

Still images don’t tell the whole story since the LED tea lights flicker as a bonus, helping to simulate the smoldering vehicle. Definitely using the Beacon rules for that scenery piece.

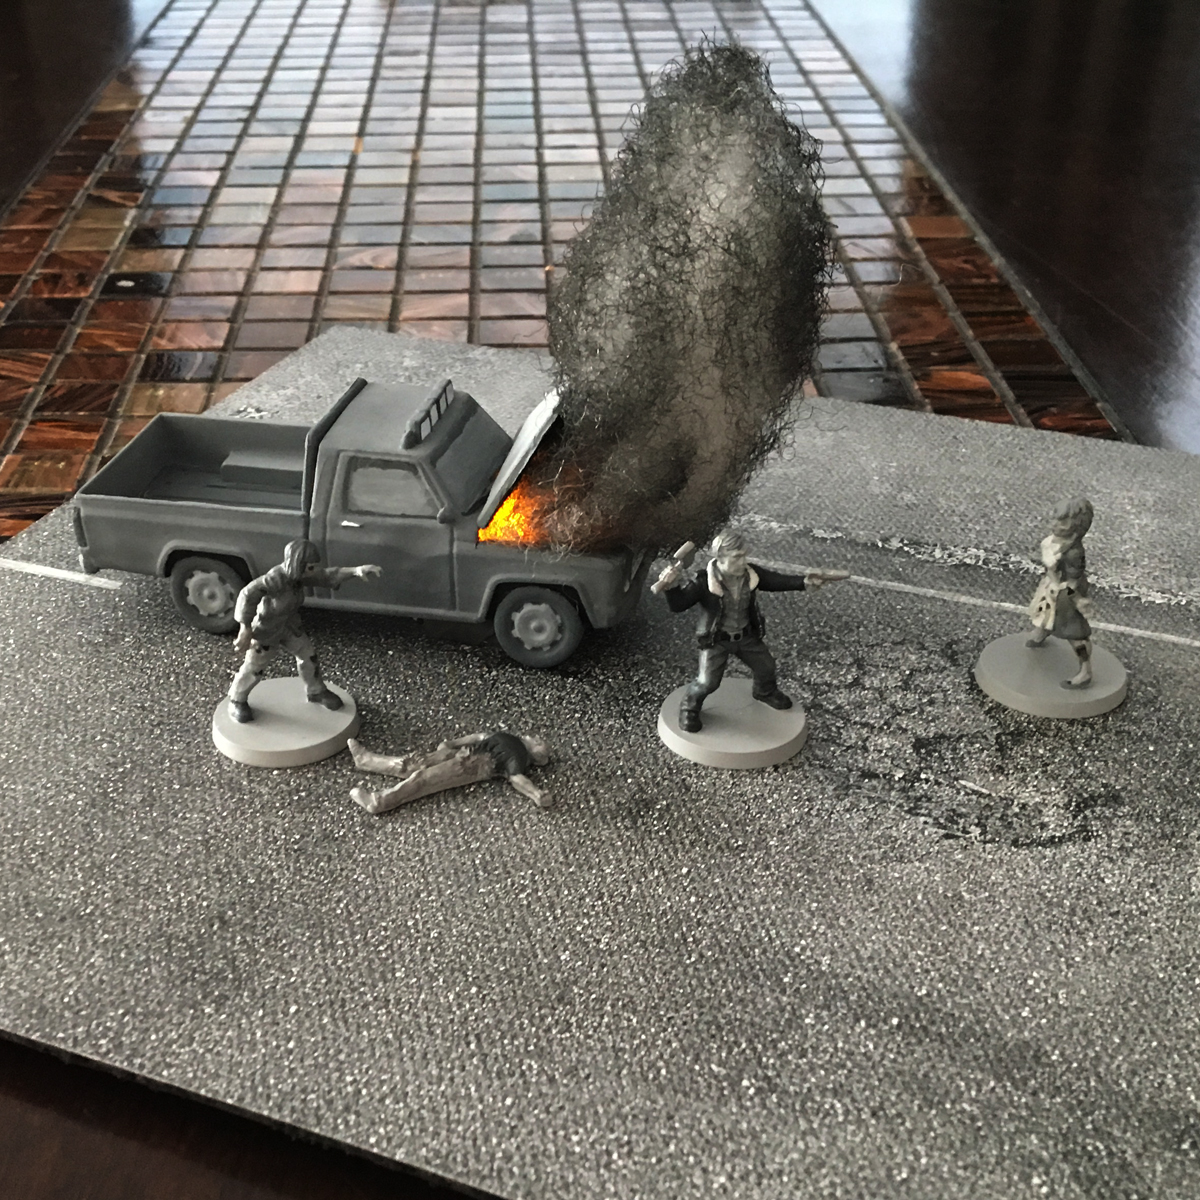
You can even skip the light to get a more muted smoked-out truck effect. All-in-all pretty easy with a little bit of a mod to the existing truck model. I assume you can do the same to the car but I haven’t tried that yet.
horrid
An awesome effect from a simple bit of hobby work; That’s the best kind. The orange “flame” contrasts your monochrome set wonderfully.