
I recently picked up the new “Walker Premium Accessory” kit that Mantic makes for the Walking Dead: All Out War game and had a chance to put it through its paces. The small kit contains a long 10″ ruler/template for noise/mayhem and walker shambling and a clear acrylic Killzone template.
I’ve been wanting a clear Killzone template ever since I saw the stock cardboard template on the Kickstarter so I’m glad to see that Mantic decided to make one. The template is a pretty standard clear acrylic with text etched in.
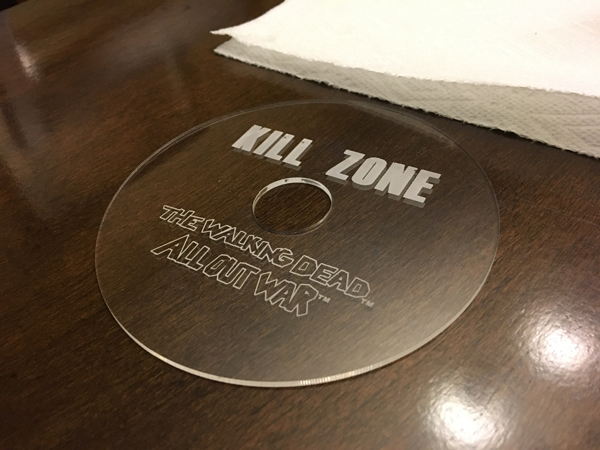
On a dark background, the text shows up pretty well but the lettering is pretty faint and since my set is all in shades of grey, the lettering gets completely lost. Time to pimp this little template out.

I’ve done this with other custom acrylic works and so I wasn’t worried. All I need is a damp paper towel, a dry paper towel and some cheap acrylic paint. I went with a deep red to get the lettering to really pop out.
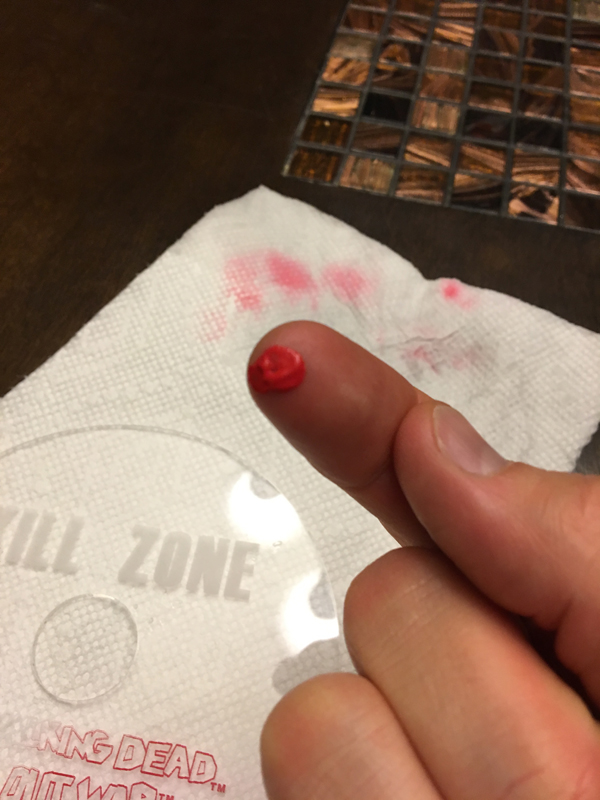
This technique is so simple. Dab a little bit of acrylic paint on your finger and then start smearing it across the etched lettering. The thinner outlined lettering at the bottom is the easiest so I started there.
Just smear it over all the etching until the paint starts to dry. When it starts to dry out, you can keep rubbing to get most of it to come off the smooth acrylic top. Periodically wipe your finger off to clean it. When most of the paint is gone, you can spot clean off trouble areas with the damp paper towel, then go over it again with the dry one. The only thing to really watch out for are long, deep scratches in the acrylic. Those might take the paint in just like the etched portions.

You shouldn’t need to worry about getting inside all the small areas as the paint should come off easily by simply wiping across the whole block of lettering. Some paint may come out of the etching but that’s ok. Let it dry and then do another layer to really finish it out.


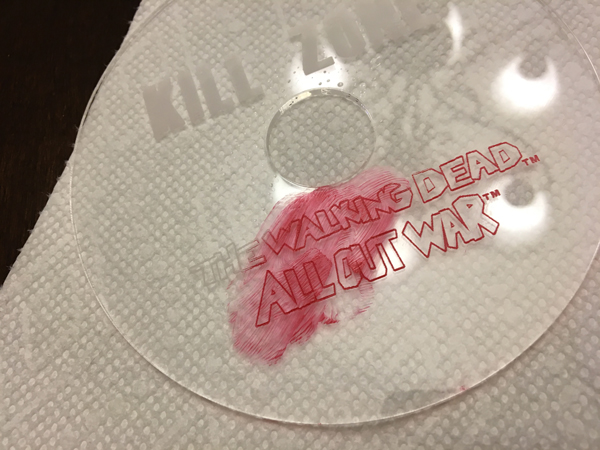
The thicker lettering for “KILL ZONE” may need more detail as it is easier to wipe away the paint in the etching but mine seemed to only need two coats. The above photos were all after one coat.
After playing around with it on the board, it seemed too faded so I went back and quickly did that second coat and I’m a lot happier.

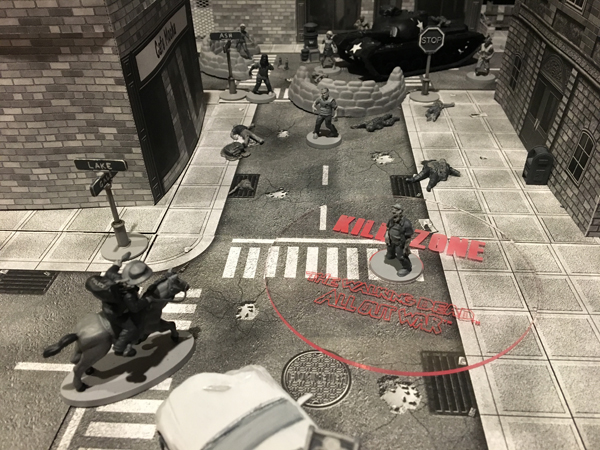
So, if you want that template to stand out better, grab some acrylic paint and start smearing.
In other news, user Kieron on Facebook had a suggestion for my extra horse-riding Rick miniature:

I thought this was brilliant so I went looking for a source and found a suitable motorcycle through Reaper’s Chronoscope miniatures line.

This was just a test fitting so nothing is glued together but I’m liking the concept and where I can go with this.