
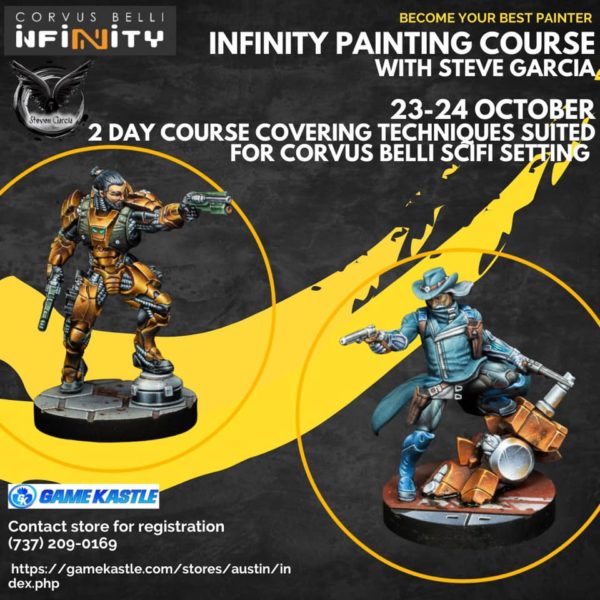
Things are still unsettled but an end date is upon us and I think I should be all set up by the end of November. I’ve never been a fan of nomadic living (not that I’ve ever really done it) and so it’ll be good to start rooting down again. I mentioned in my last post that Steve Garcia was hosting a marathon painting class and since I had some time today, I wanted to share a bit about the experience.
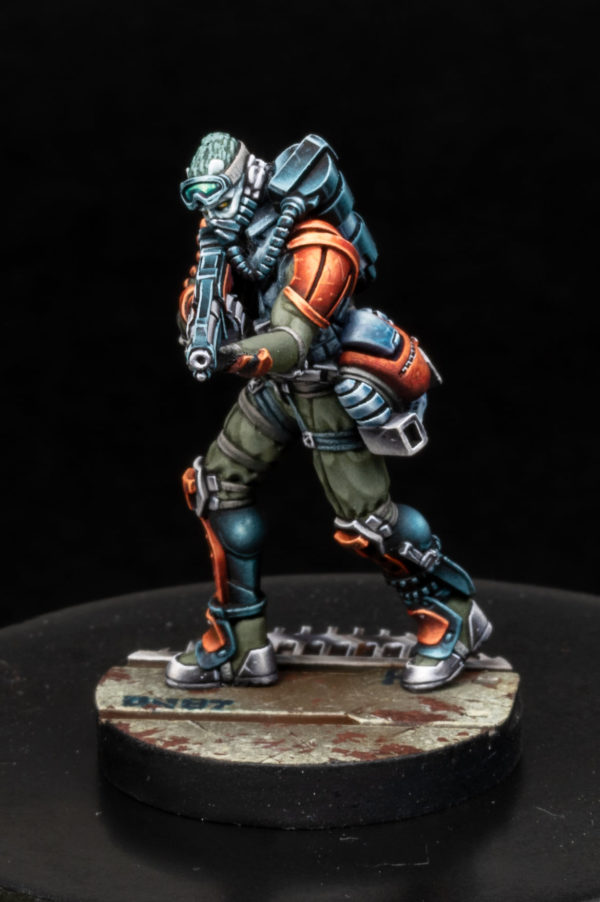
The class goal was to take this Cube Jaeger miniature from Corvus Belli’s Infinity line from a primed state all the way across the finish line like Steve Garcia’s example above. Obviously, this will be a big stretch for me as I typically do not deal with blends or non-metallic metals often when I paint through but that was my main goal in taking on this adventure.
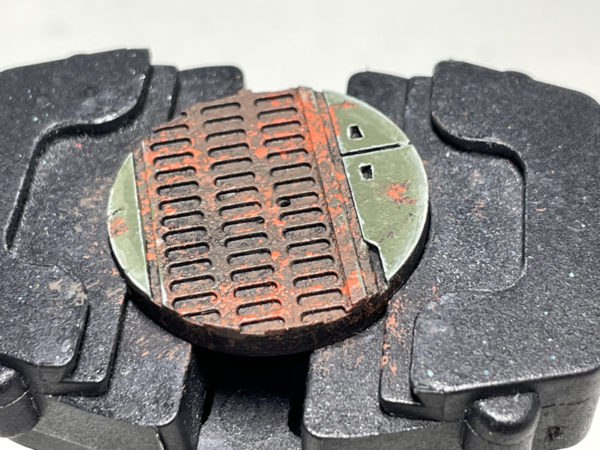
We actually started with the base. It was all primed black and we were going to go through a few different techniques to warm up. We first focused on doing a rusty undercoat, applying chipping medium and masking fluid, then finally overcoating with the green main base color. I didn’t realize that we weren’t rusting out the center grate so I went a bit nuts there and will have to ultimately cover it up.
The base green cover used some wet blending techniques to emphasize the lighter outer edge of the base and finish with some edge highlighting.
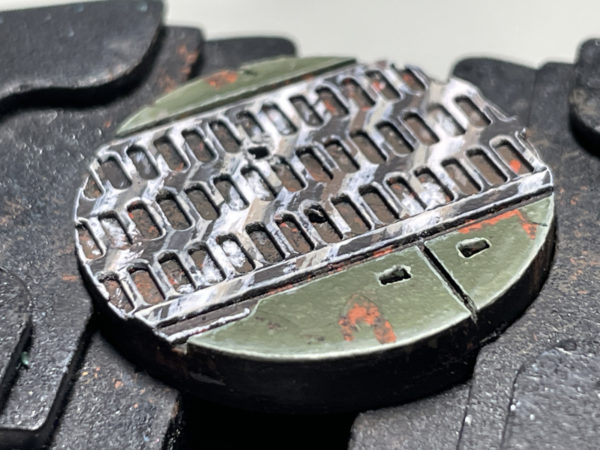
Then we got to our first test of NMM work as we shined up the metal grate. The rust undercoat ended up working out here to give some additional interest to the shiny plate. This NMM technique was surprisingly easy and fun if not for the monotonous edge highlighting all those plate indents. I would have liked to have the plate lighter overall to give the plate a more general shine but I was otherwise very pleased with the base.


Next, we mounted up the minis (using a pin drilled into the resin base) and got to work on the cloth elements, namely the pants and arms. We also worked on the straps and leather which seemed to be everywhere on the model.
The technique here was to use stippling to create a rougher texture that would give the feel of a rough cloth material. Stippling hasn’t gone well for me in the past and it didn’t really thrill me here either. No time to dwell though as we had to push on.

At this point we started working on the NMM details, specifically the “black” metal that is on the figures calves as well as a warm silver like the base plate in the shoes, gun innards, and lower parts of his cube bag and knee guards. Lastly, we worked on blue tinted silver for the other parts of the bag and cannister innards.
This took us the rest of the day and I was pretty wiped. I realized at one point I was just slopping paint onto the shoes, forgetting I was supposed to be trying a NMM technique.
We broke for dinner and had a fun time talking community, industry, and gaming. I took the hour long drive home to eventually crash and start it again.
The next morning, I drove back out and we hit the NMM work hard again, starting first with more theory as we approached the harder shapes. The Sunday session got us doing more of the blue metal of the main gun, the inner guards on the ankles and more work on the canister, face mask and hoses. We also did some stippling on the inner vest clothing to complete those parts as well.
With all the work we were doing, including more theory on color as well as light shapes on metal and individual instruction, we were only able to talk about the final orange metal. All in all, it was a very good and comprehensive start on not only the techniques like blending, stippling, and NMM but also on how Steve Garcia approaches his project and plans out the model color schemes.
Supplying us with the final color spreads, we were able to take our models home and finish on our own, assuming our wet palettes held. Luckily, mine did so I finished up anything I missed and then spread out my orange metal palette, pulling my own paints as close as I could to the recommendations provided.

With that final clean up and the orange NMM applied, the mini really comes together. Literally, all the way up to that left arm orange paldron, the last thing I painted, I was not really feeling it come together. Once it was finished, though, and I had a chance to pull back and look at it all, it seemed to work out.
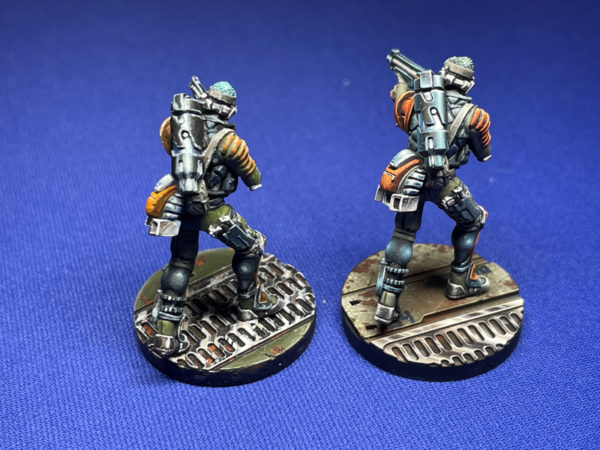
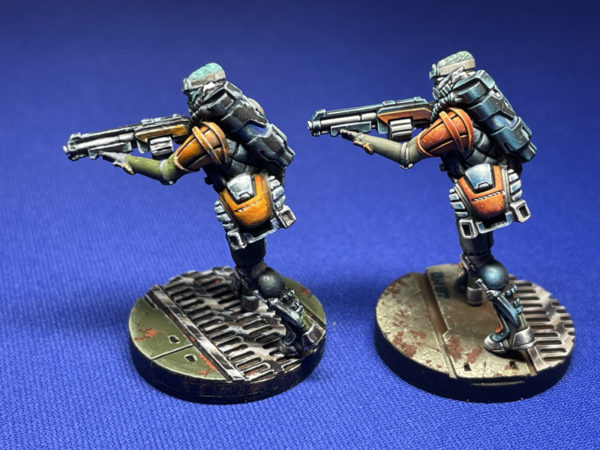
All these images are zoomed in on purpose to really show the unrefined elements of my technique (and for me to see where I need to focus on). This can be unsettling to people kind of like looking at pictures of themselves or hearing their own voice but I like seeing all the jagged lines and paint slops. Well, I don’t want to see them and prefer that I would just “do better” but they show where I need to spend more time refining and also taking breaks. I think this last point is the most important as I know where I was in my sessions on most of the model and can tell where I was really focused and doing well vs times that I was just fatigued and trying to “get through it”.
On the table, it looks quite nice and while it uses techniques I don’t have in any of my other figures right now, I’m ok with it and will still be happy to put this guy in the field.
And now for the really big kick in the crotch 🙂

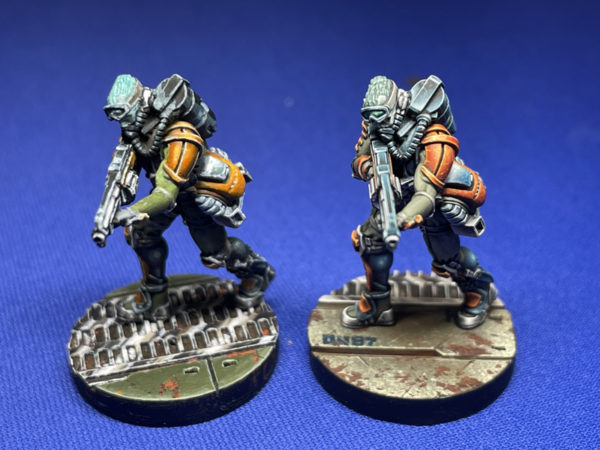
One of these two is not like the other…